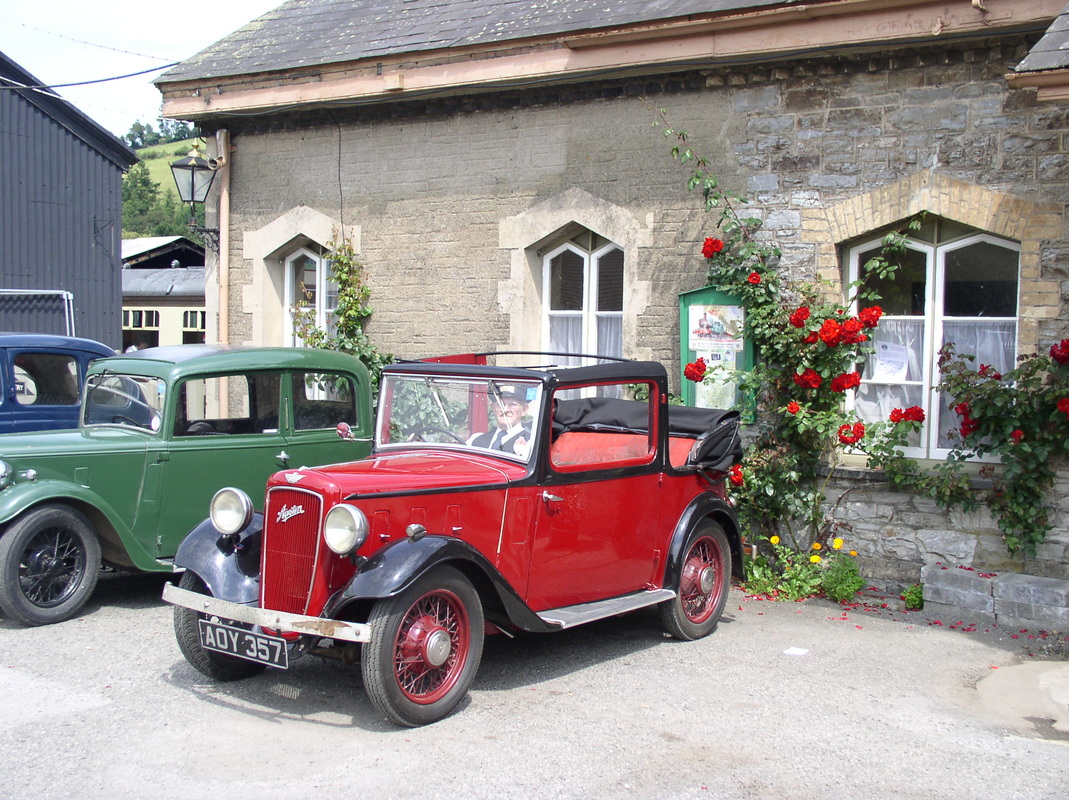
Restoring 'Olwyn' Colwyn
- by Richard Elliott
|
|
|

|
|
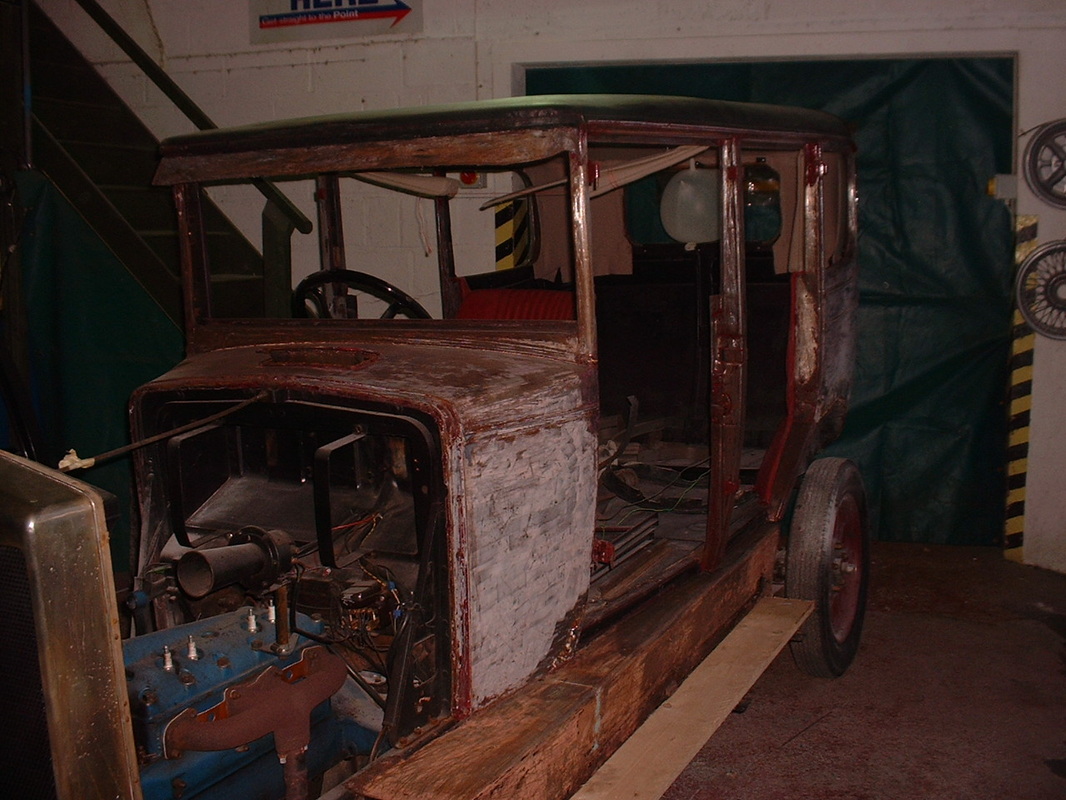
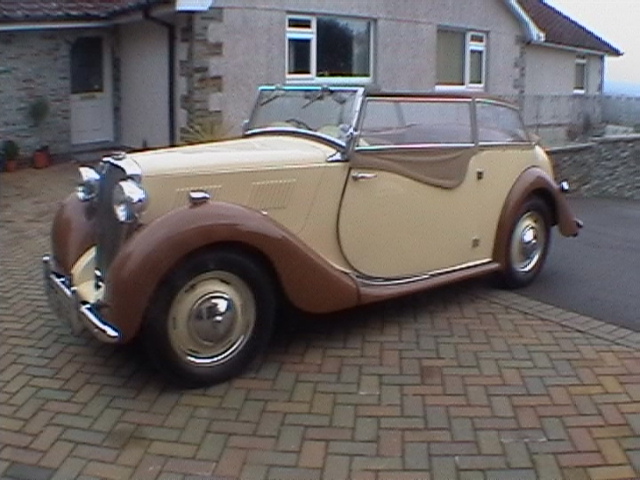
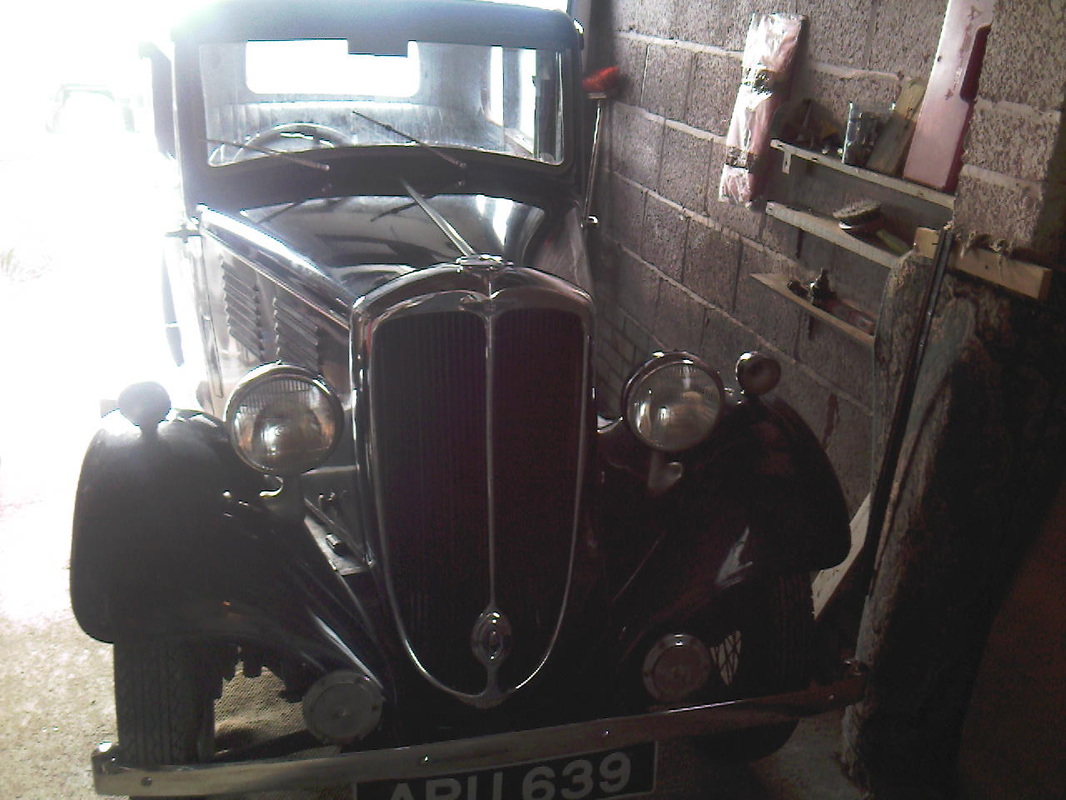
I had always harboured a liking for the Austin 10 and particular the Colwyn Cabriolet version. This was really because we had one as the family car back in the early 1950’s. Not that we had it that long but it was the first car I remember – I was only about 5 years old at the time. Father was in the RAF and was stationed at Chivenor in North Devon at the time. We frequently travelled to and from Plymouth in it and also went on family holidays to North Cornwall. I remember we used to sit in the back and get wet when it rained as the water used to come in the roof and on one occasion the gear lever came off in Dad’s hand and we had to make the journey in second gear. That car was dark green – MJ 5831. I don’t suppose it still exists – anybody seen it?
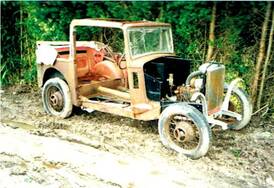
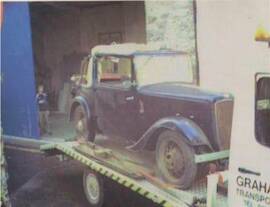
So, when I saw one advertised in Auto Trader in early 2002 the vendor had a sure sale – as long as it had four wheels and an engine. I duly went along to see it wearing my rose tinted spectacles and made the usual enquiries, like do the wheels go round and was the engine a runner – real in depth stuff. Actually, it was missing quite a few important parts but I was assured that they were all to hand at his yard in Mid Devon. So, subject to these parts being truly available, a deal was struck and the car delivered on a trailer to Buckfastleigh where it was allocated space in a lock up where it is to be gradually restored.
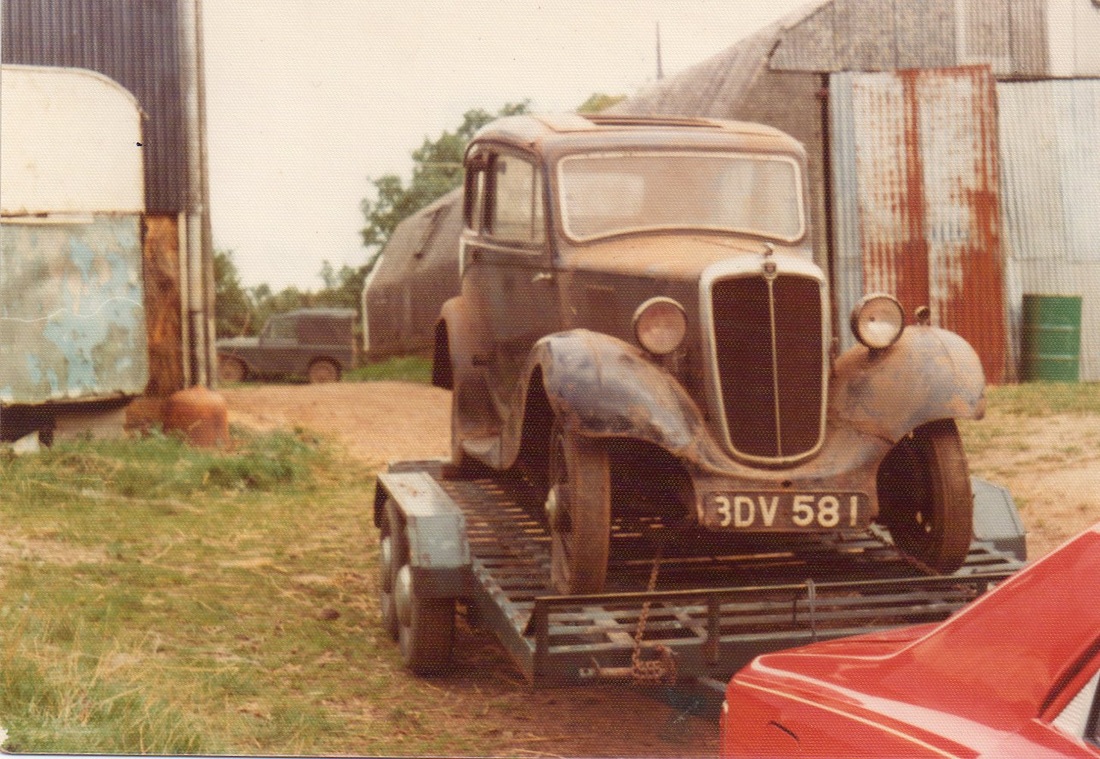
The next move was to get the missing bits. A trip to Mid Devon ensued where an interesting hour or so was spent finding the various parts amongst a collection of motoring detritus and mud. The main parts required were both headlights, both sidelights, both bumpers and the rear seats. The car had been stored for a while in the open and up to its axles in the mud. Eventually all these were located plus sundry other bits such as a spare wheel, a window winder mechanism, one side air vent scuttle still in its original maroon paint – the rest of the car having been resprayed black. Fortunately, the vendor had lots of paperwork including the last buff log book, last MOT, last tax disc (1961) and last insurance certificate. So, although the car has never been issued with a new V5 it should to be possible to recover the old registration number with the help of either the Austin Ten Drivers Club or Devon Vintage Car Club. The car was registered AOY 357 in May 1935, so I live in hope.
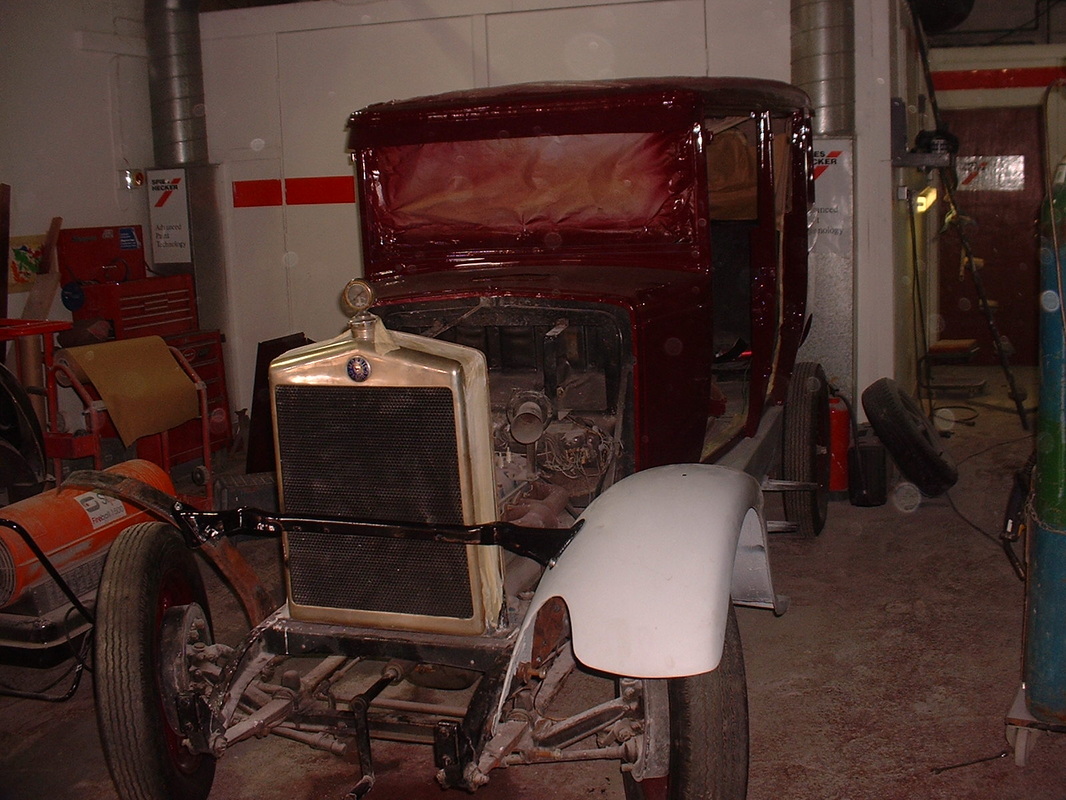
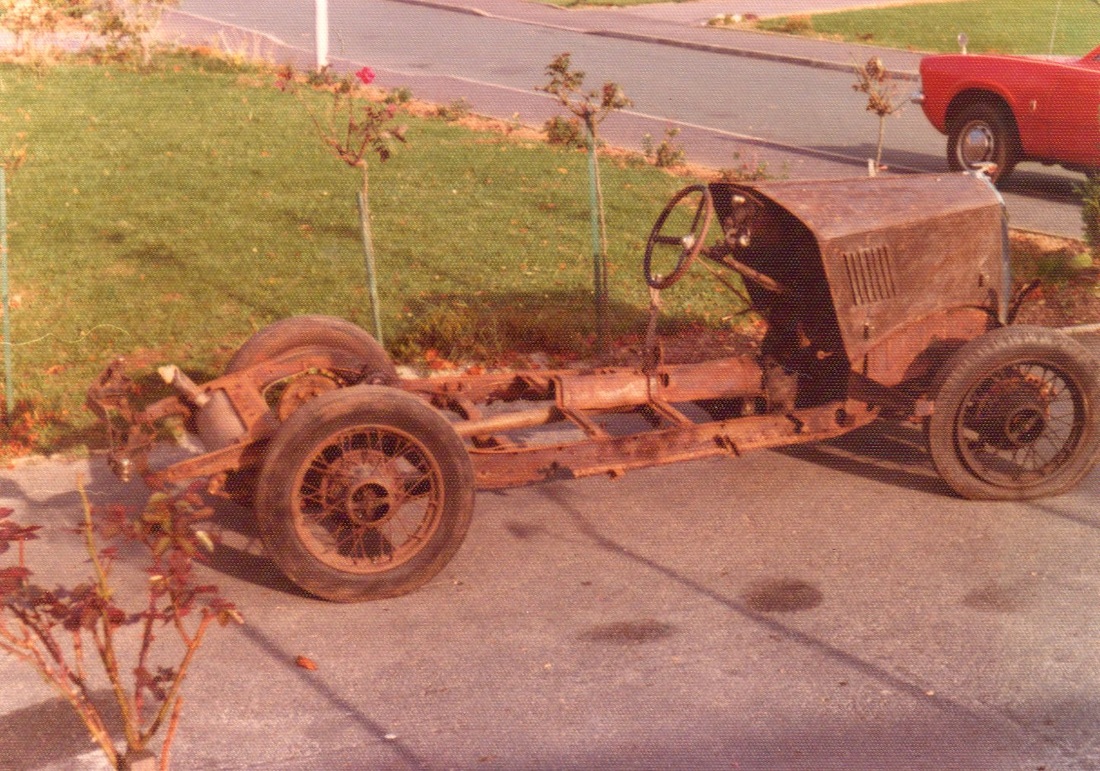
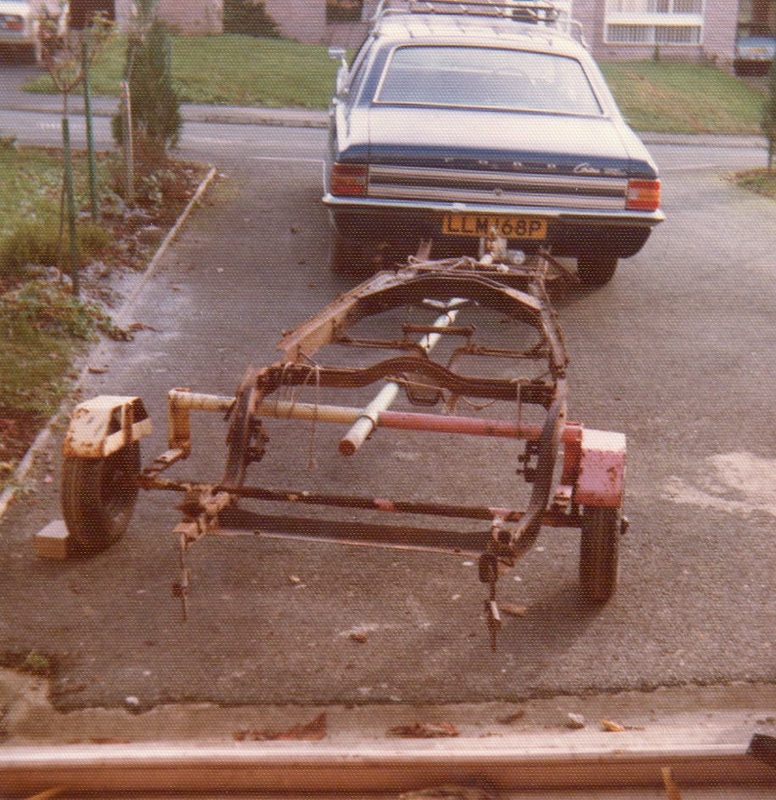
The story of the car since 1961 is somewhat vague but it appears it was kept out the back of a wine bar in London for many years and somehow then found itself in Cornwall where a garage was given the job of carrying out a rebuild. It would seem quite a lot of time and effort was expended on this but then for some reason the job was abandoned. Then the garage itself went bankrupt and the car was bought as part of a job lot by the dealer from whom I subsequently purchased it. He recovered as much as he could from the garage site and set about putting the car together for resale. As I have progressed the restoration I have found that many items were only just fixed on loosely with the odd nut and bolt. And ‘odd’ nut and bolt just about sums it up as no two nuts and bolts seem to be alike! The trickiest jobs I have had to do so far are to tackle a complete rewire, rebuild the doors which were lacking all trim, glass and the passenger door window winder, and make up the two running boards. It is clear that the body had received lots of attention although to see the picture of it sitting in the mud at the dealers yard you would be hard put to believe that!
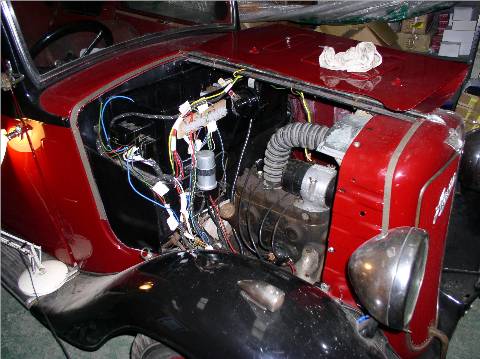
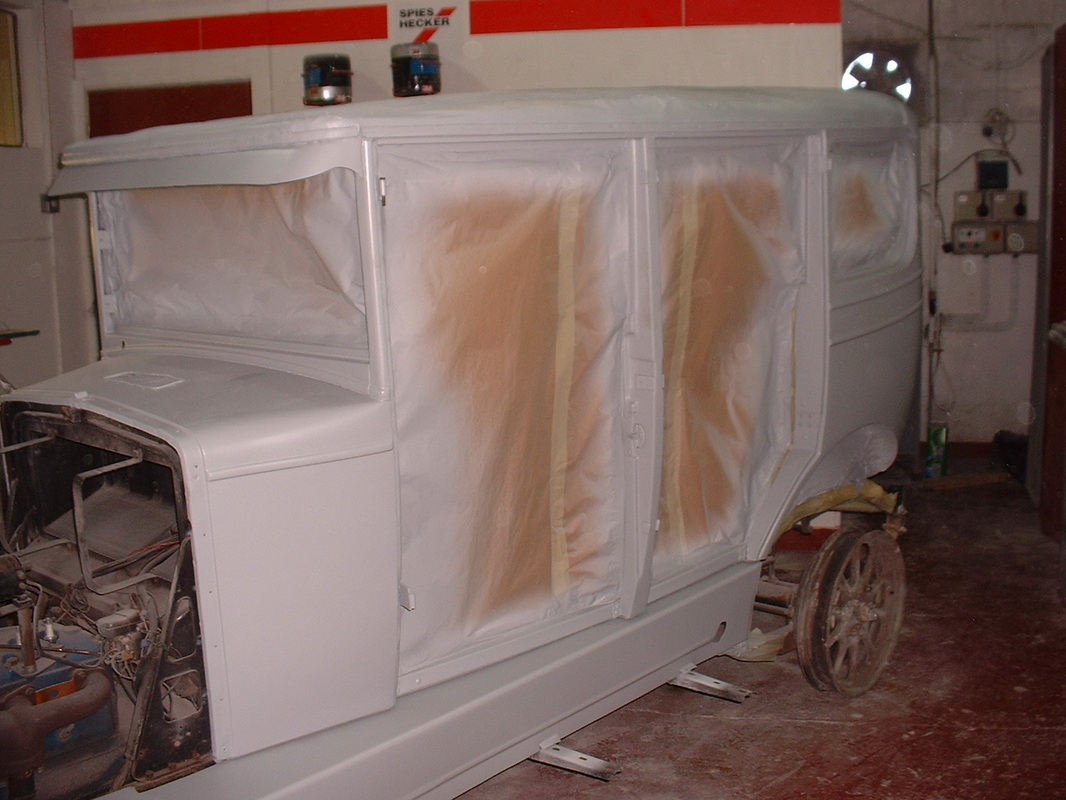
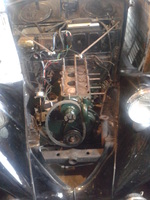
Anyway, in early January the time came to press the magic button. But not before some time and effort in trying to locate ‘top dead centre’ to set the ignition. Various books suggested various methods. The Austin 10 manual made it sound easy – just look at the flywheel and the marks are there. But to see that you need to be a contortion and I’m not! In practice the best way was to remove all the plugs but number 1 and then turn the engine to feel when it went into a compression stroke. Then set the distributor by guesswork. After a little persuasion it fired up. Initial impression is that the dealers story that the engine had been overhauled might even be true as it runs very sweetly. A little further adjustment by physically moving the distributor before tightening it up should have it set correctly. Now the current job is refitting the body panels having had them resprayed into original black and maroon. That was a bit of fun – pushing the car the wrong way up a one way street to get it to the car body shop and then back down again a week or two later after the job had been done. It’s a bit of a sweat making sure the beautifully restored panels don’t get scratched but I’m managing! But I have to keep wife, Jill, out of the spare bedroom in case she finds the door being rebuilt on the double bed. With the panels back on I can start to get the wiring to the lights in place. Then its off to Ivybridge to have a new hood made and fitted and visit the local garage for an MOT!
Update 2012
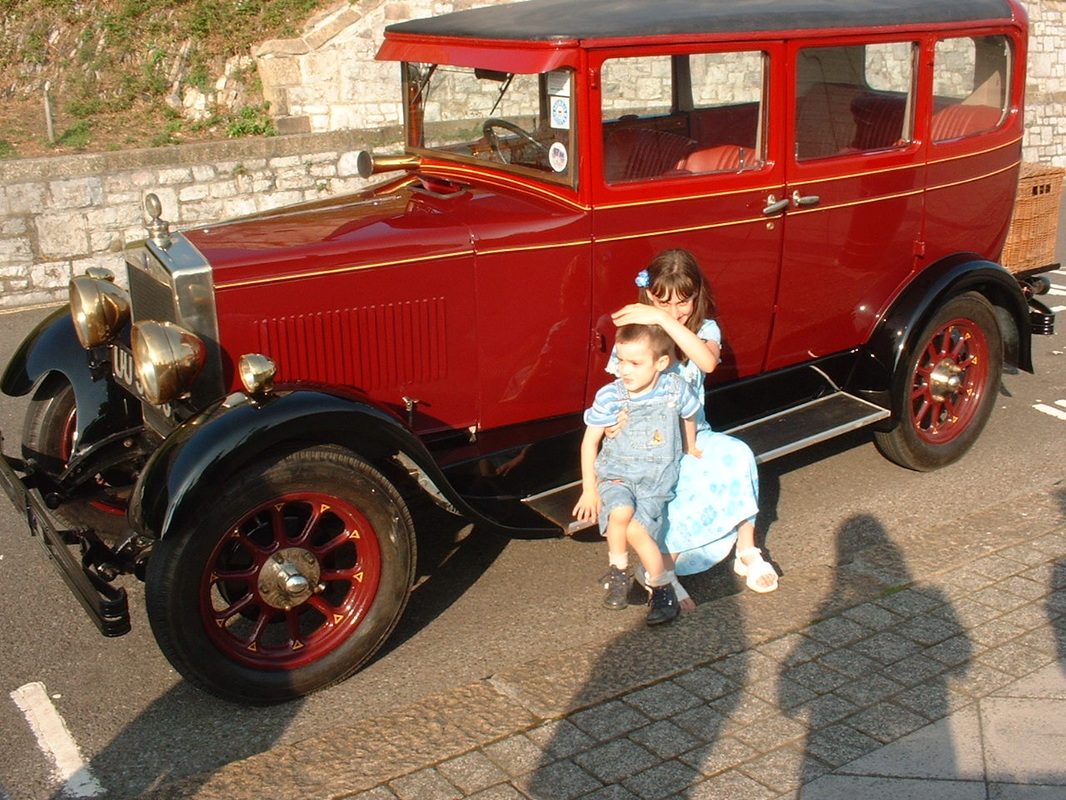
Well, the above was written some 10 years ago. The car duly made it back on the road in 2004. Since then it has been running beautifully and made many appearances at shows and at the South Devon Railway. Its also performed important duties for the weddings of both my offspring, being driven by my Son to take his new bride to the reception and by myself to take my daughter to the Church. Happy times!
So, when I saw one advertised in Auto Trader in early 2002 the vendor had a sure sale – as long as it had four wheels and an engine. I duly went along to see it wearing my rose tinted spectacles and made the usual enquiries, like do the wheels go round and was the engine a runner – real in depth stuff. Actually, it was missing quite a few important parts but I was assured that they were all to hand at his yard in Mid Devon. So, subject to these parts being truly available, a deal was struck and the car delivered on a trailer to Buckfastleigh where it was allocated space in a lock up where it is to be gradually restored.
The next move was to get the missing bits. A trip to Mid Devon ensued where an interesting hour or so was spent finding the various parts amongst a collection of motoring detritus and mud. The main parts required were both headlights, both sidelights, both bumpers and the rear seats. The car had been stored for a while in the open and up to its axles in the mud. Eventually all these were located plus sundry other bits such as a spare wheel, a window winder mechanism, one side air vent scuttle still in its original maroon paint – the rest of the car having been resprayed black. Fortunately, the vendor had lots of paperwork including the last buff log book, last MOT, last tax disc (1961) and last insurance certificate. So, although the car has never been issued with a new V5 it should to be possible to recover the old registration number with the help of either the Austin Ten Drivers Club or Devon Vintage Car Club. The car was registered AOY 357 in May 1935, so I live in hope.
The story of the car since 1961 is somewhat vague but it appears it was kept out the back of a wine bar in London for many years and somehow then found itself in Cornwall where a garage was given the job of carrying out a rebuild. It would seem quite a lot of time and effort was expended on this but then for some reason the job was abandoned. Then the garage itself went bankrupt and the car was bought as part of a job lot by the dealer from whom I subsequently purchased it. He recovered as much as he could from the garage site and set about putting the car together for resale. As I have progressed the restoration I have found that many items were only just fixed on loosely with the odd nut and bolt. And ‘odd’ nut and bolt just about sums it up as no two nuts and bolts seem to be alike! The trickiest jobs I have had to do so far are to tackle a complete rewire, rebuild the doors which were lacking all trim, glass and the passenger door window winder, and make up the two running boards. It is clear that the body had received lots of attention although to see the picture of it sitting in the mud at the dealers yard you would be hard put to believe that!
Anyway, in early January the time came to press the magic button. But not before some time and effort in trying to locate ‘top dead centre’ to set the ignition. Various books suggested various methods. The Austin 10 manual made it sound easy – just look at the flywheel and the marks are there. But to see that you need to be a contortion and I’m not! In practice the best way was to remove all the plugs but number 1 and then turn the engine to feel when it went into a compression stroke. Then set the distributor by guesswork. After a little persuasion it fired up. Initial impression is that the dealers story that the engine had been overhauled might even be true as it runs very sweetly. A little further adjustment by physically moving the distributor before tightening it up should have it set correctly. Now the current job is refitting the body panels having had them resprayed into original black and maroon. That was a bit of fun – pushing the car the wrong way up a one way street to get it to the car body shop and then back down again a week or two later after the job had been done. It’s a bit of a sweat making sure the beautifully restored panels don’t get scratched but I’m managing! But I have to keep wife, Jill, out of the spare bedroom in case she finds the door being rebuilt on the double bed. With the panels back on I can start to get the wiring to the lights in place. Then its off to Ivybridge to have a new hood made and fitted and visit the local garage for an MOT!
Update 2012
Well, the above was written some 10 years ago. The car duly made it back on the road in 2004. Since then it has been running beautifully and made many appearances at shows and at the South Devon Railway. Its also performed important duties for the weddings of both my offspring, being driven by my Son to take his new bride to the reception and by myself to take my daughter to the Church. Happy times!
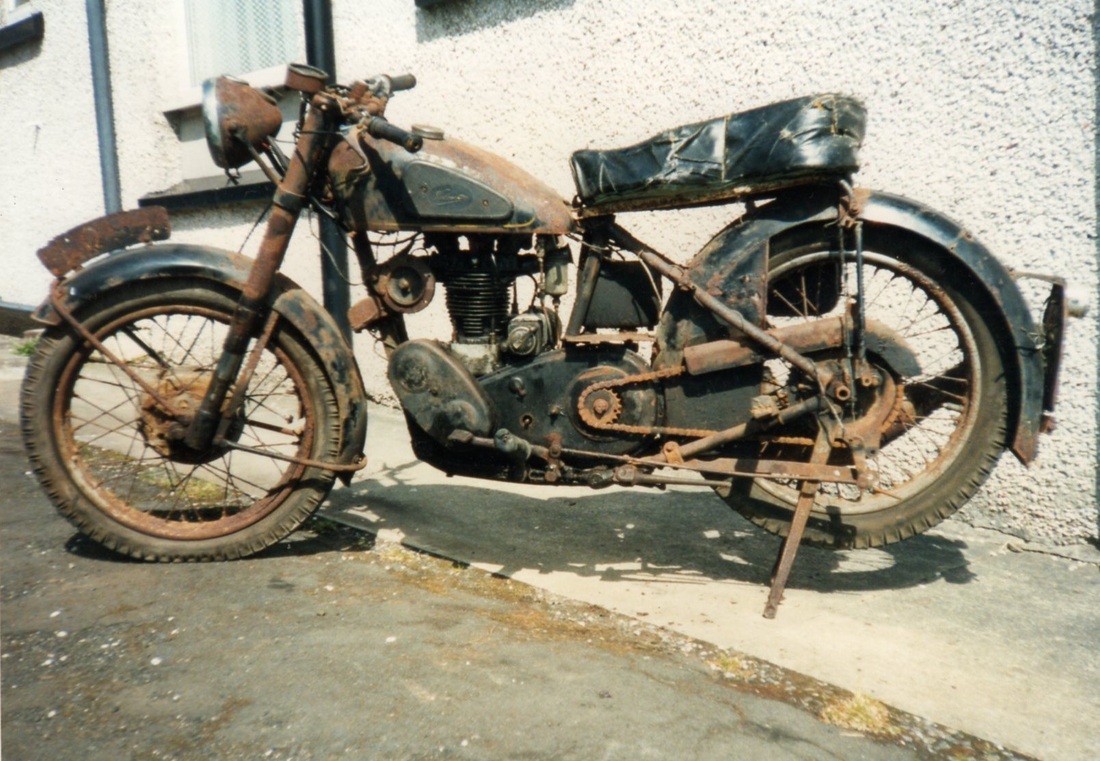
Restoring Velocette Motorcycle
- Gerald Lobb
|

|
|
|
|

|
|
|
|

|
|
|
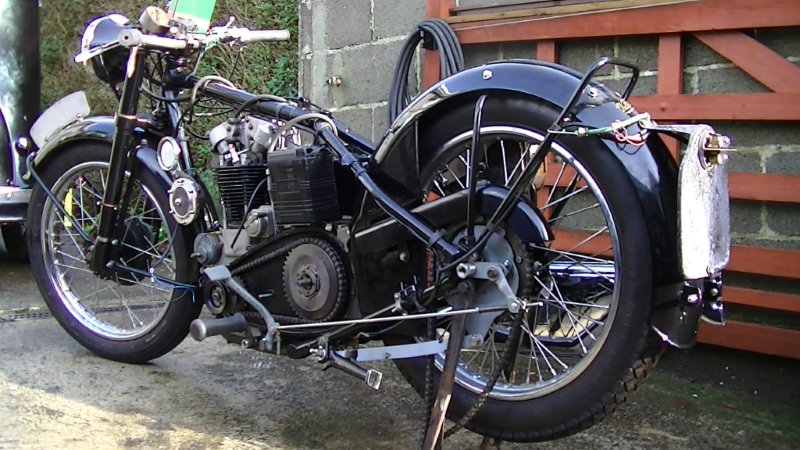
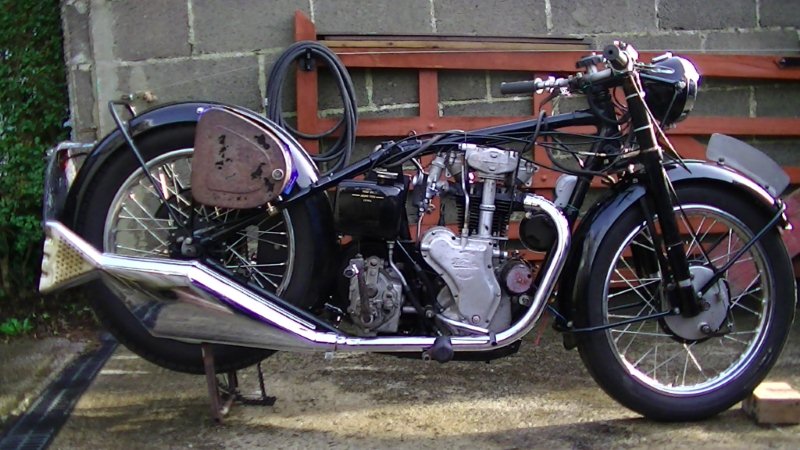
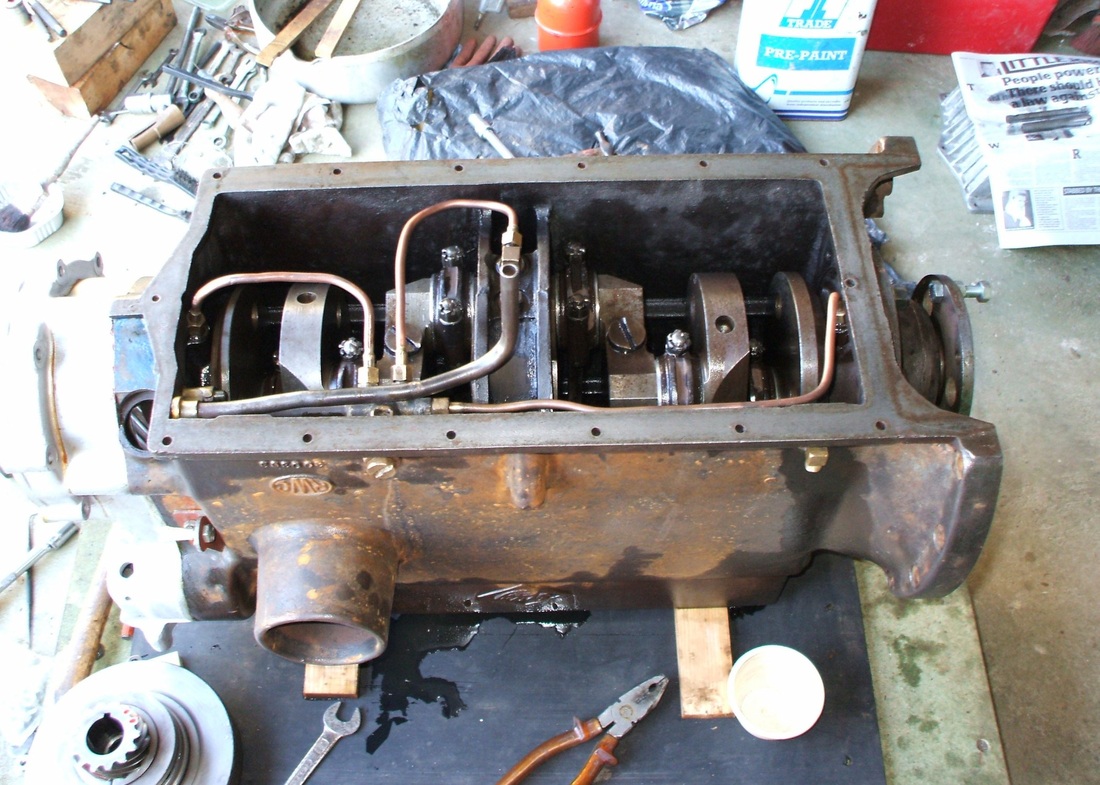
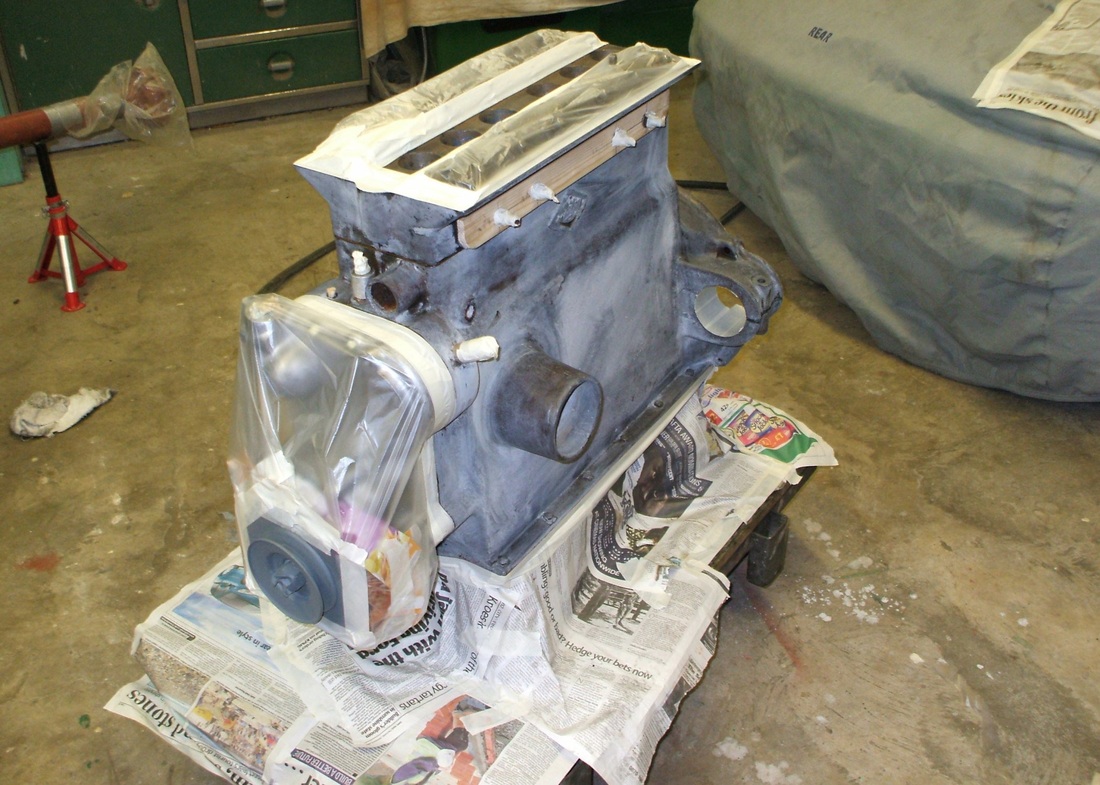
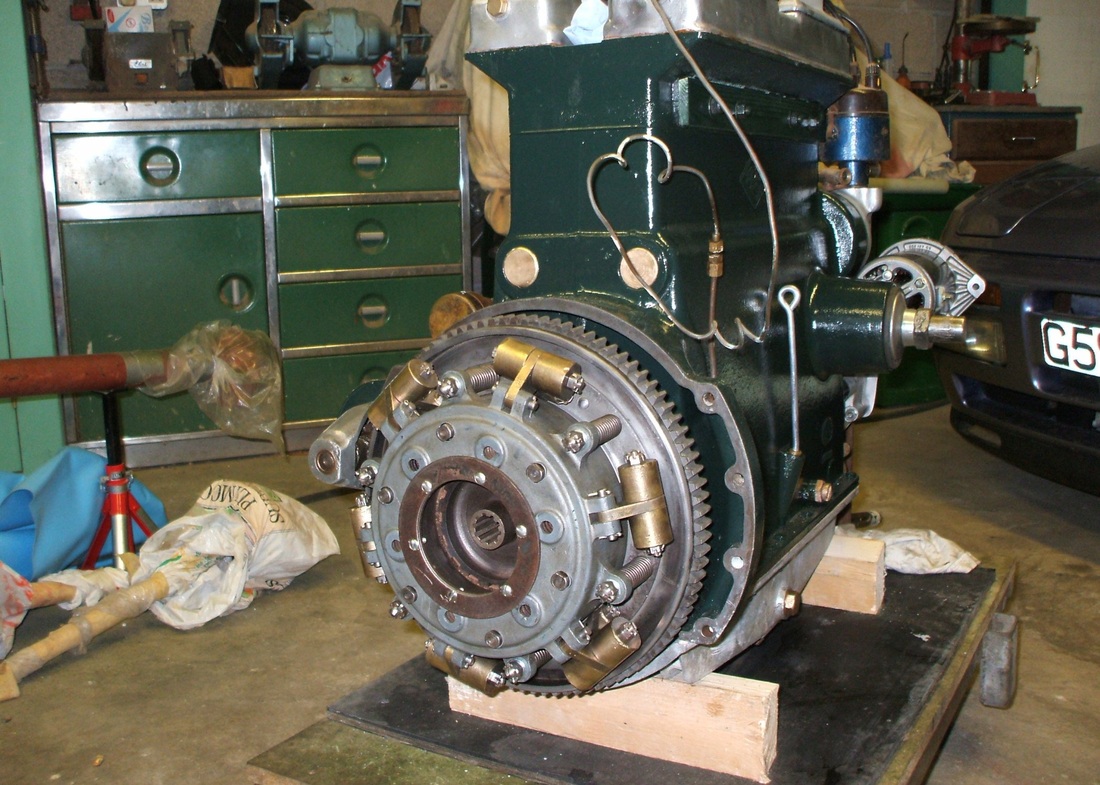
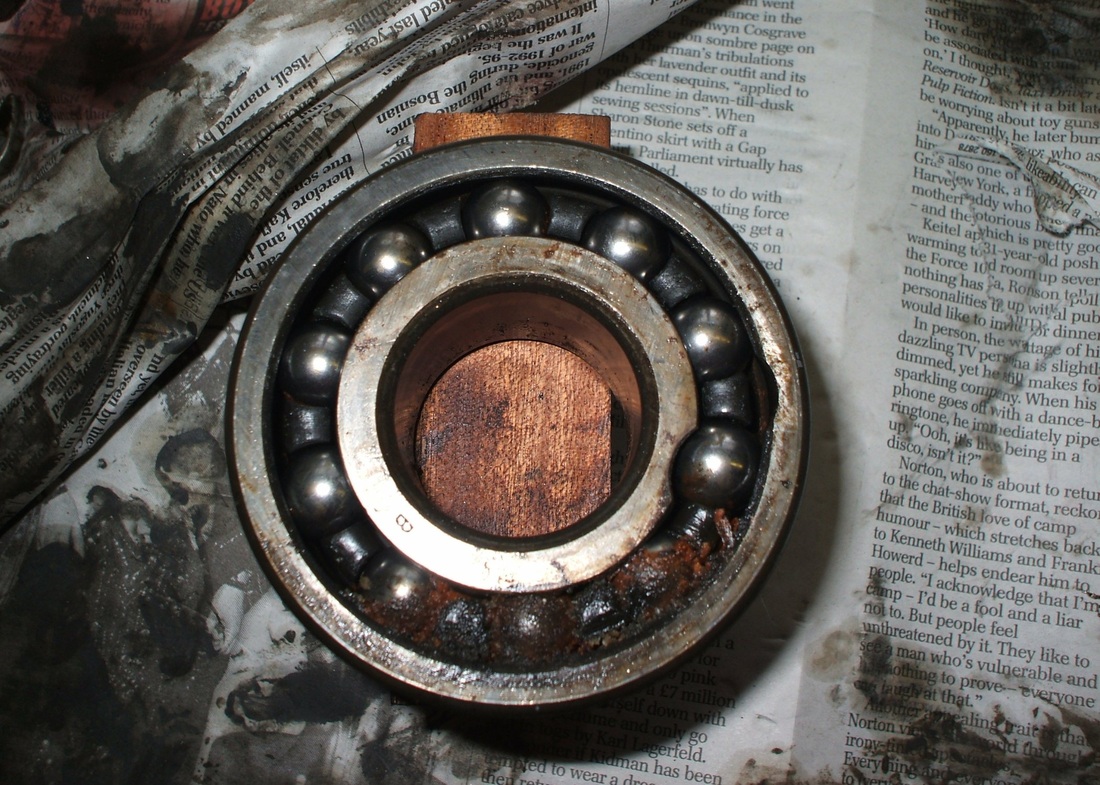
VELOCETTE REBUILD
- Gerald Lobb
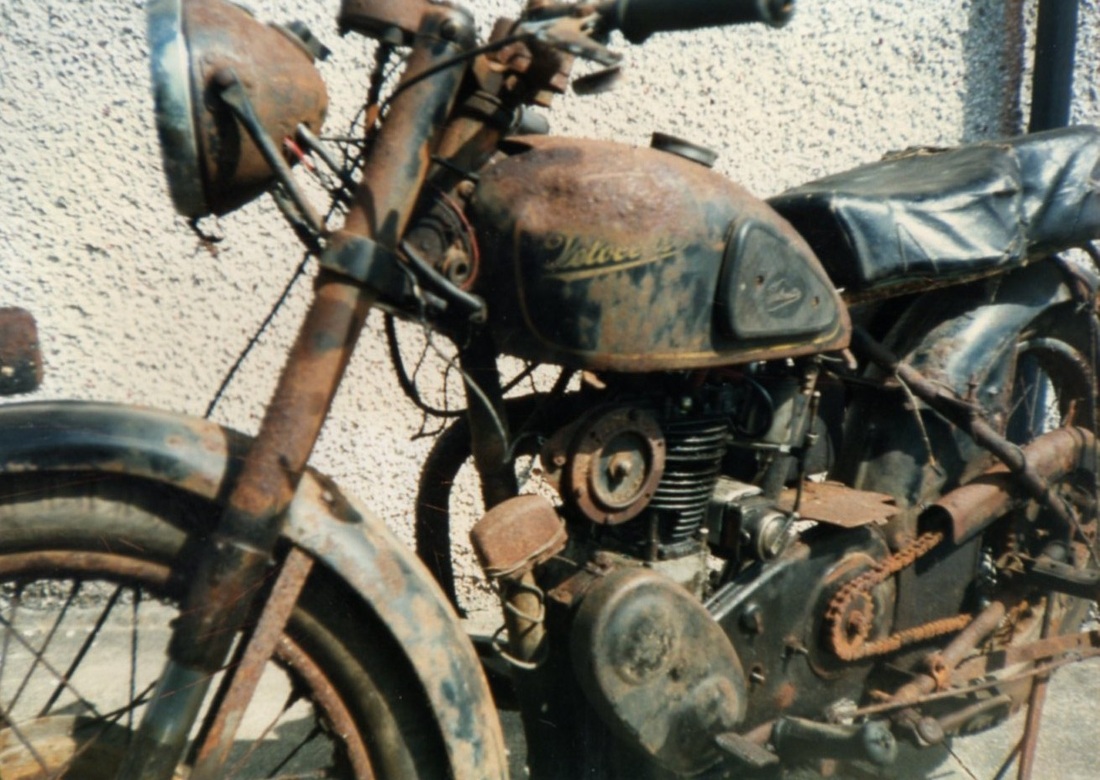
I acquired this Velocette 350 MAC (Rigid) about 15 years ago. It was abandoned in a garden, and in a poor condition, rusty frame, rusty wheels, and broken parts, but with a bit of tinkering by an expert (not me) and some fresh petrol it did kick over and run, a little noisy with the rusted out exhaust but it was a runner.
Once again you look at these projects and think that won’t take much to sort out!
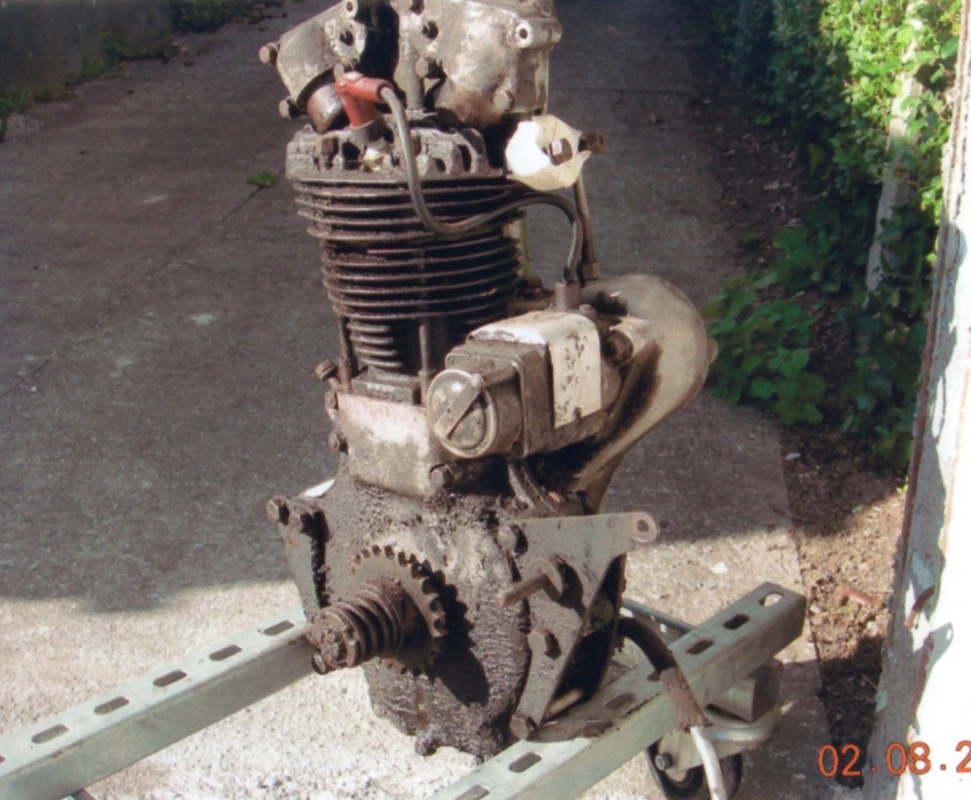
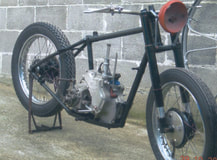
So it was stripped down, the frame powder coated, the engine and gear box stripped down, new bearings, bush’s fitted, the barrel had a crack in the base, this was welded and the hole barrel honed, a new piston was fitted, this was from a Triumph Daytona, at the time I could not get an original piston and I was told by a fellow Velocette owner that his bike had one fitted and worked well. The rear bearing alloy end plate of the dynamo had disintegrated so I found another expert at work who machined and welded a replacement end plate. He also made a new gear foot change arm from a piece of an office chair, and welded up the gaping hole in the petrol tank. I managed to make a new set of handle bars from stainless steel tube and the company’s hydraulic bender, a tool was made to dismantle the Dowty front forks and examine all the seals inside, new bronze bushes were made for the chrome sliders, yes by another expert on a lathe. (We did manage to get our proper work done!)
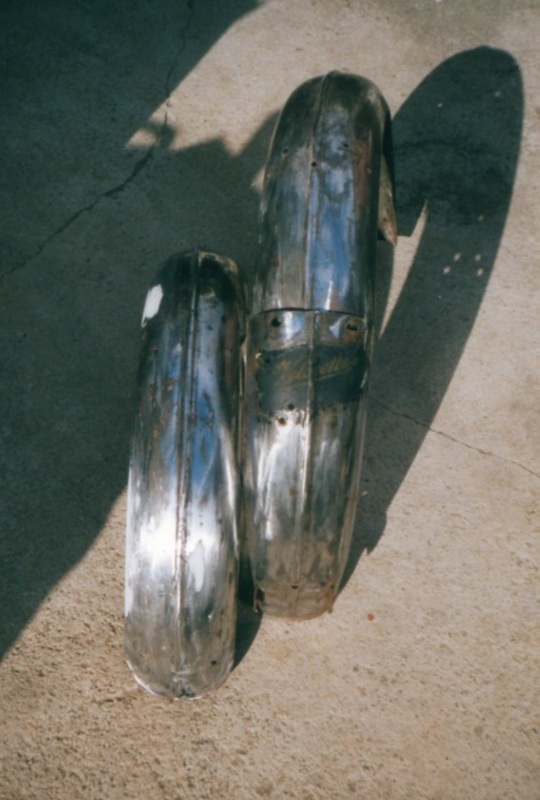
Yet another expert made up new sections of mudguards and welded them in, getting them back to shape.
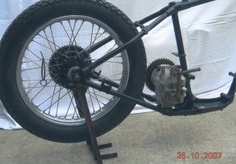
The wheels were sent off to be rebuilt, there was a choice of Italian chrome or British chrome rims, I chose the British, the spokes are stainless and the tyres are Avon Road Runner to the original pattern.
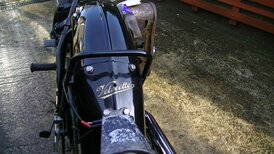
I started to do the paint work on the tin ware myself, but after a couple of disasters with the primers and undercoats reacting I decided to pay a man to do it, he also fitted the transfers and lacquered them at the same time as the paint.
All this work in a few lines, it does not sound much, but as you know those that have done a rebuild it takes time. Don’t add up the cost, if I was doing it for a living I would have been bankrupt years ago! The rebuild is still ongoing.
- Gerald Lobb
I acquired this Velocette 350 MAC (Rigid) about 15 years ago. It was abandoned in a garden, and in a poor condition, rusty frame, rusty wheels, and broken parts, but with a bit of tinkering by an expert (not me) and some fresh petrol it did kick over and run, a little noisy with the rusted out exhaust but it was a runner.
Once again you look at these projects and think that won’t take much to sort out!
So it was stripped down, the frame powder coated, the engine and gear box stripped down, new bearings, bush’s fitted, the barrel had a crack in the base, this was welded and the hole barrel honed, a new piston was fitted, this was from a Triumph Daytona, at the time I could not get an original piston and I was told by a fellow Velocette owner that his bike had one fitted and worked well. The rear bearing alloy end plate of the dynamo had disintegrated so I found another expert at work who machined and welded a replacement end plate. He also made a new gear foot change arm from a piece of an office chair, and welded up the gaping hole in the petrol tank. I managed to make a new set of handle bars from stainless steel tube and the company’s hydraulic bender, a tool was made to dismantle the Dowty front forks and examine all the seals inside, new bronze bushes were made for the chrome sliders, yes by another expert on a lathe. (We did manage to get our proper work done!)
Yet another expert made up new sections of mudguards and welded them in, getting them back to shape.
The wheels were sent off to be rebuilt, there was a choice of Italian chrome or British chrome rims, I chose the British, the spokes are stainless and the tyres are Avon Road Runner to the original pattern.
I started to do the paint work on the tin ware myself, but after a couple of disasters with the primers and undercoats reacting I decided to pay a man to do it, he also fitted the transfers and lacquered them at the same time as the paint.
All this work in a few lines, it does not sound much, but as you know those that have done a rebuild it takes time. Don’t add up the cost, if I was doing it for a living I would have been bankrupt years ago! The rebuild is still ongoing.
1929 Morris Oxford & 1950 MG YT - Anil Koshti
Preparing for respraying
|
|
|
Respary Completeed
|

MG YT Body off Restortaion in Austraila
|
|
|
Restored MG YT
|
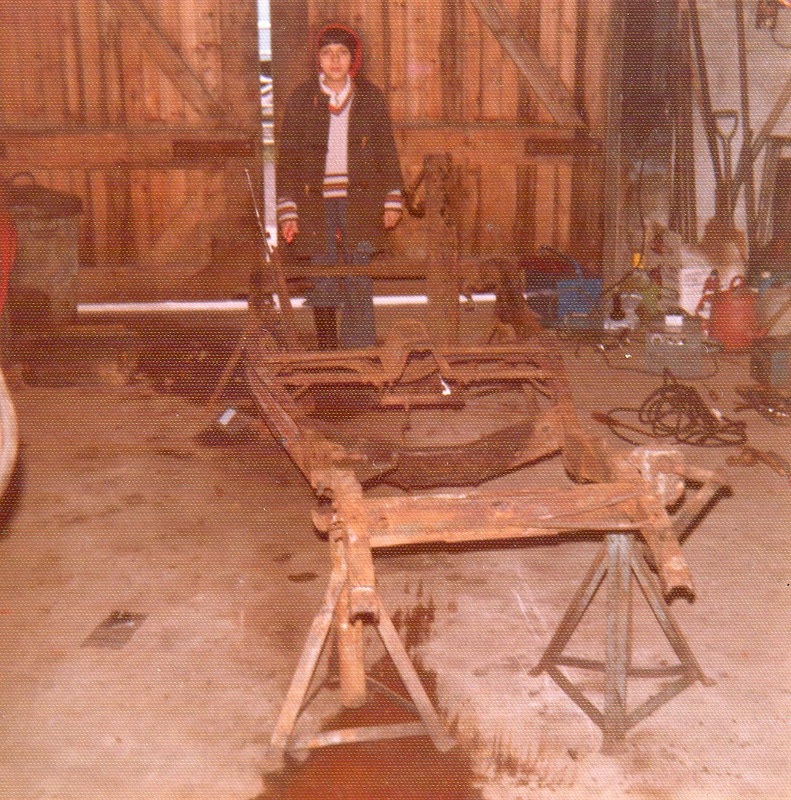
Anil Koshti: 1935 Morris 8. A Barn find in 1977 & A Big Mistake trying to Restore it!
October 1977 - Barn Find. Wife Marion said ' never knew rust costs so much'
|

Rusted body off the chassis
|
|
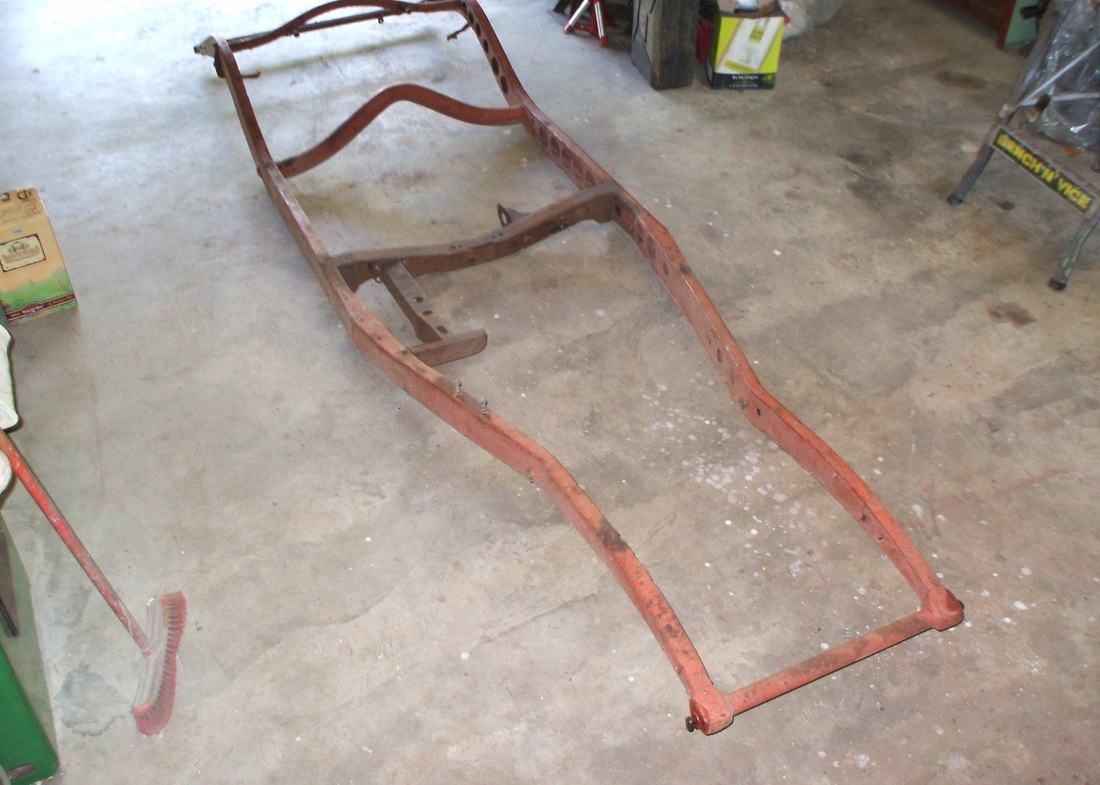
Chassis ready to be taken to friend for welding
|
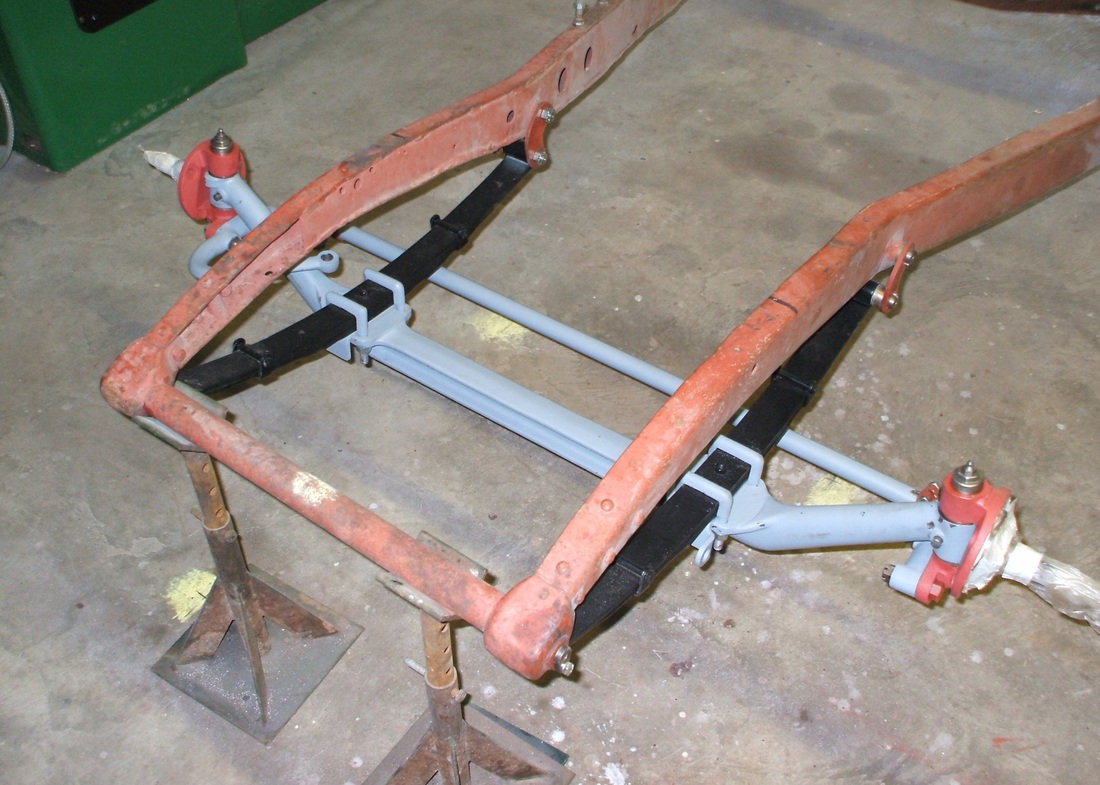
Ready for welding
|
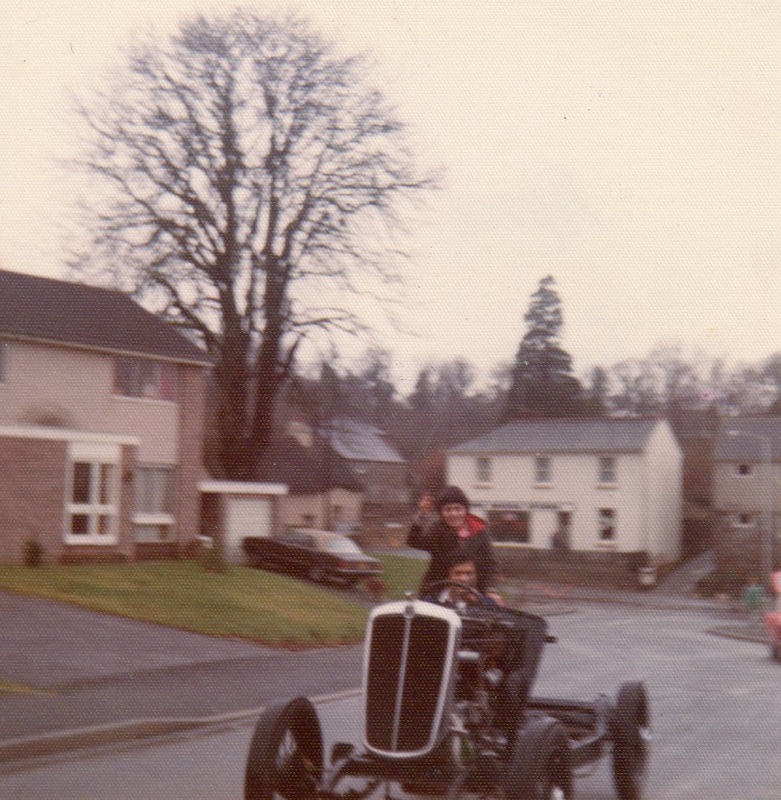
April 1978 - Running chassis being tested. Body too rusted - lost enthusiasm after this!
|
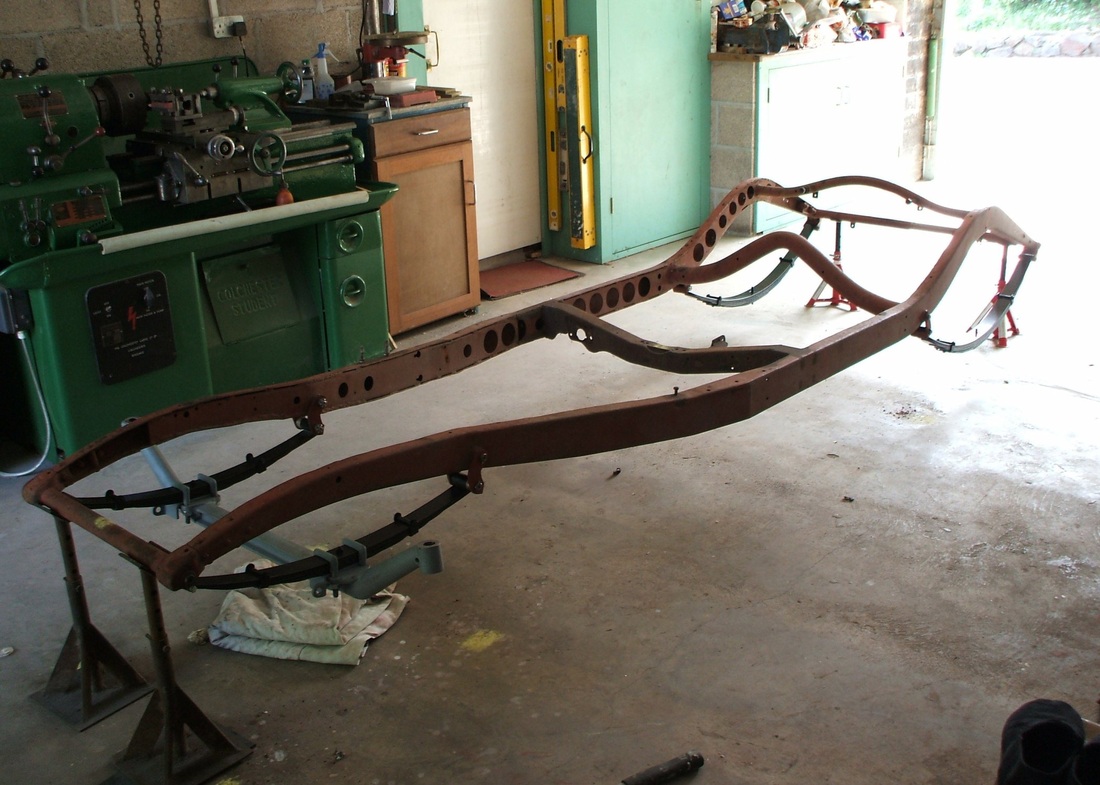
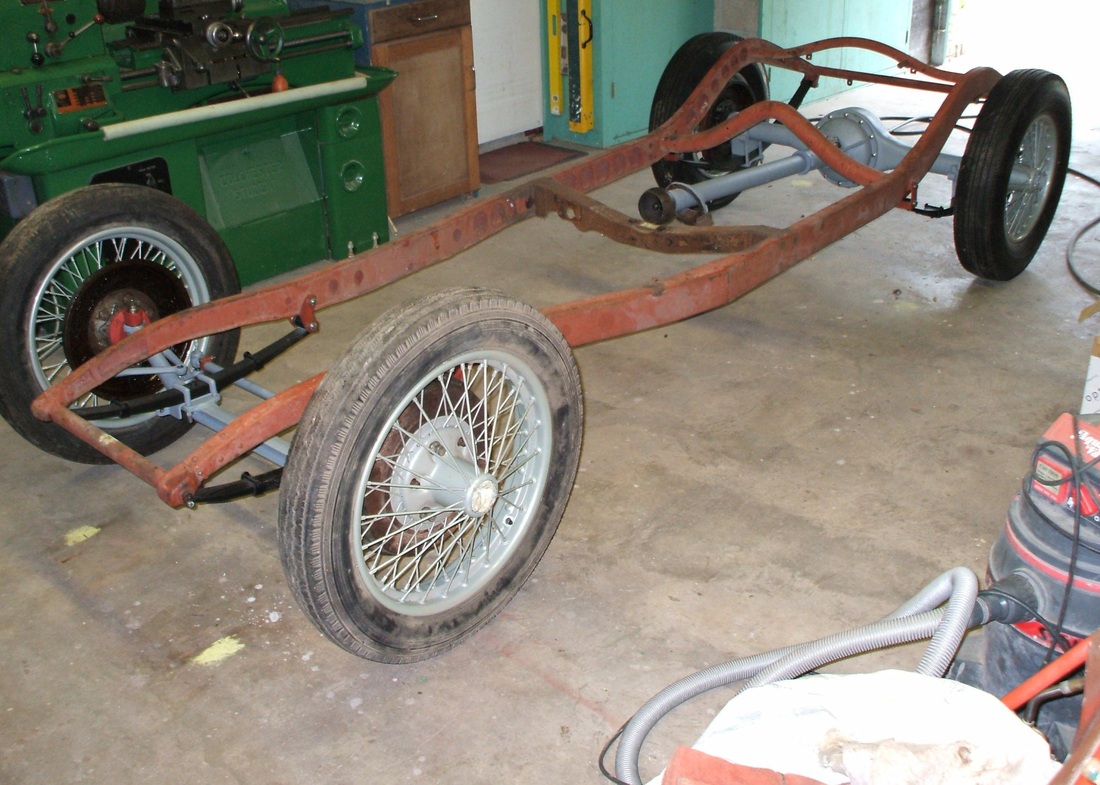
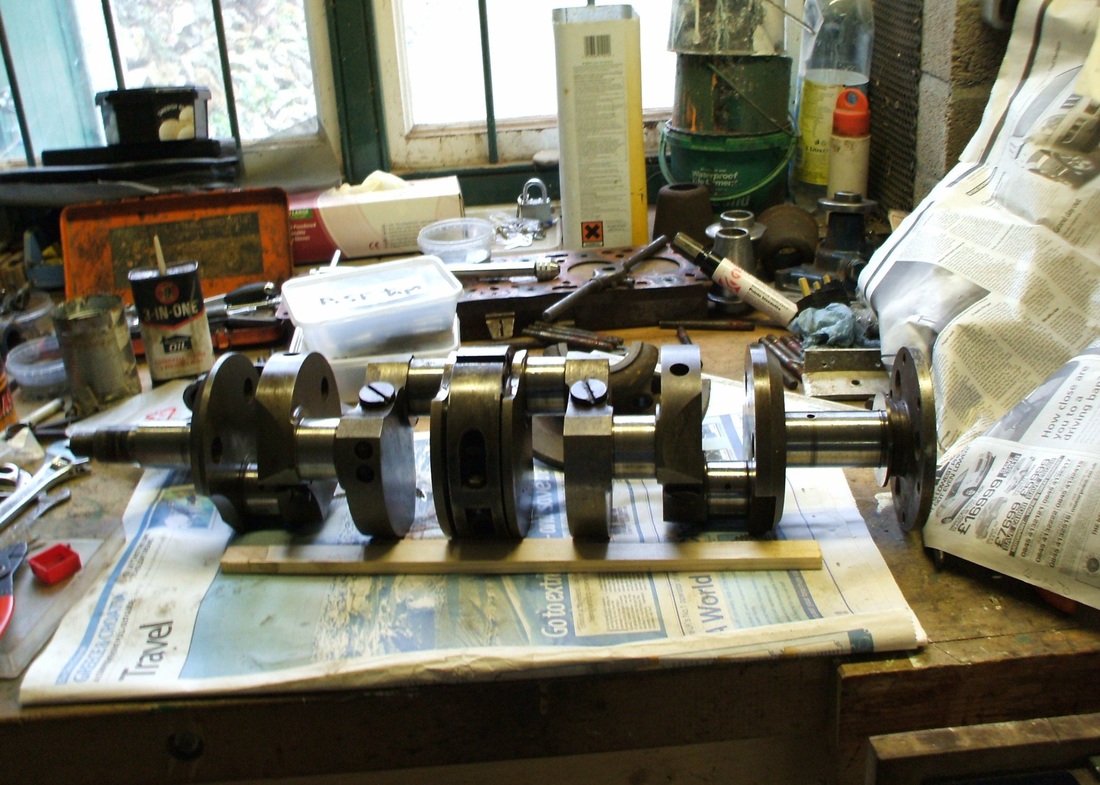
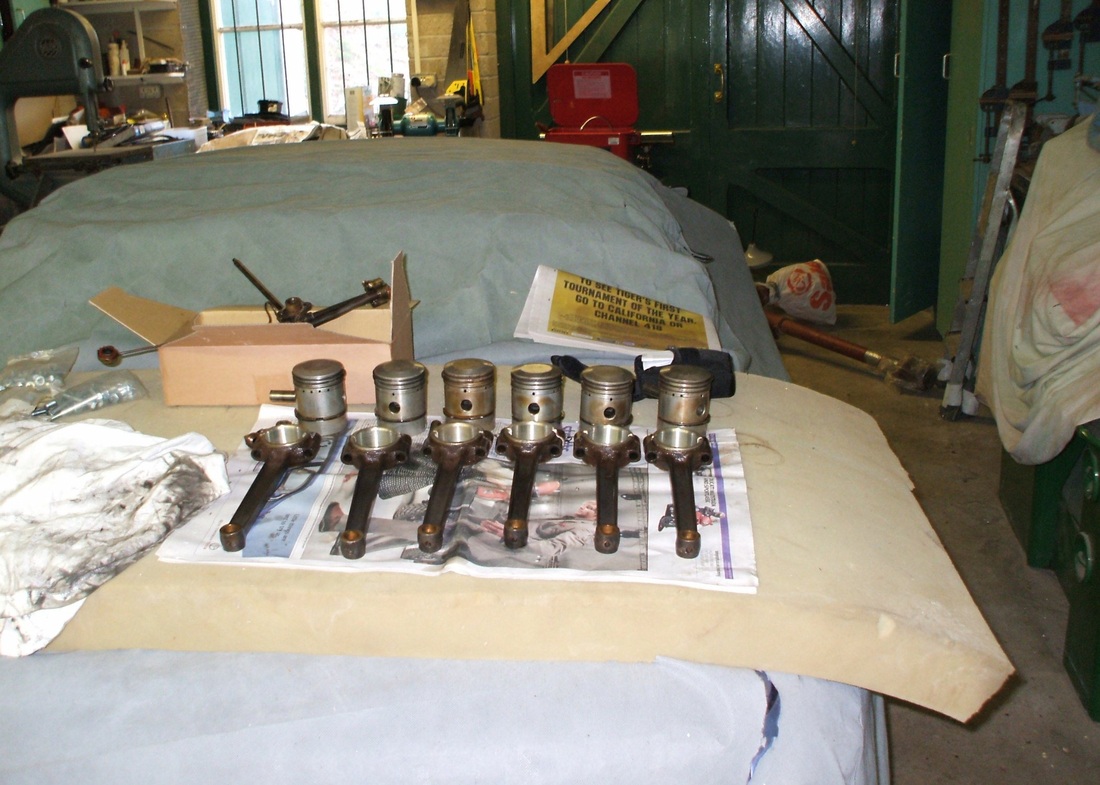
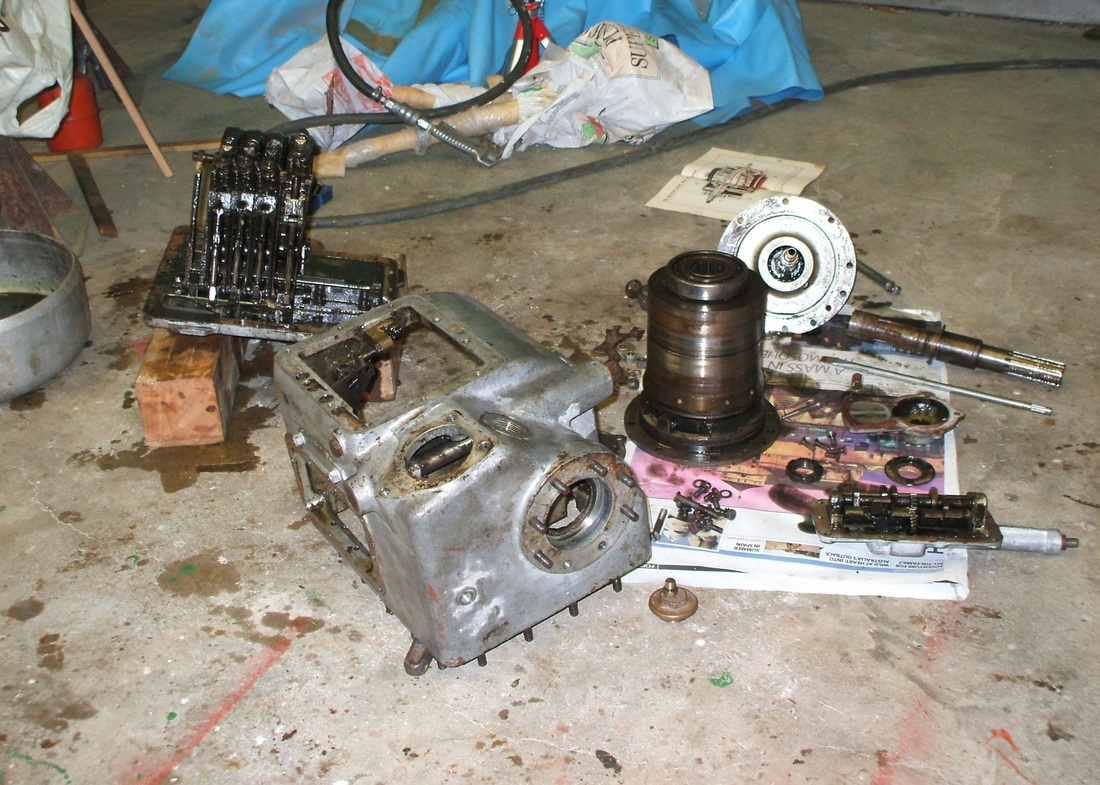
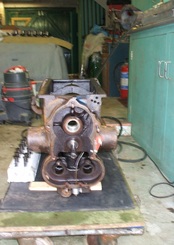
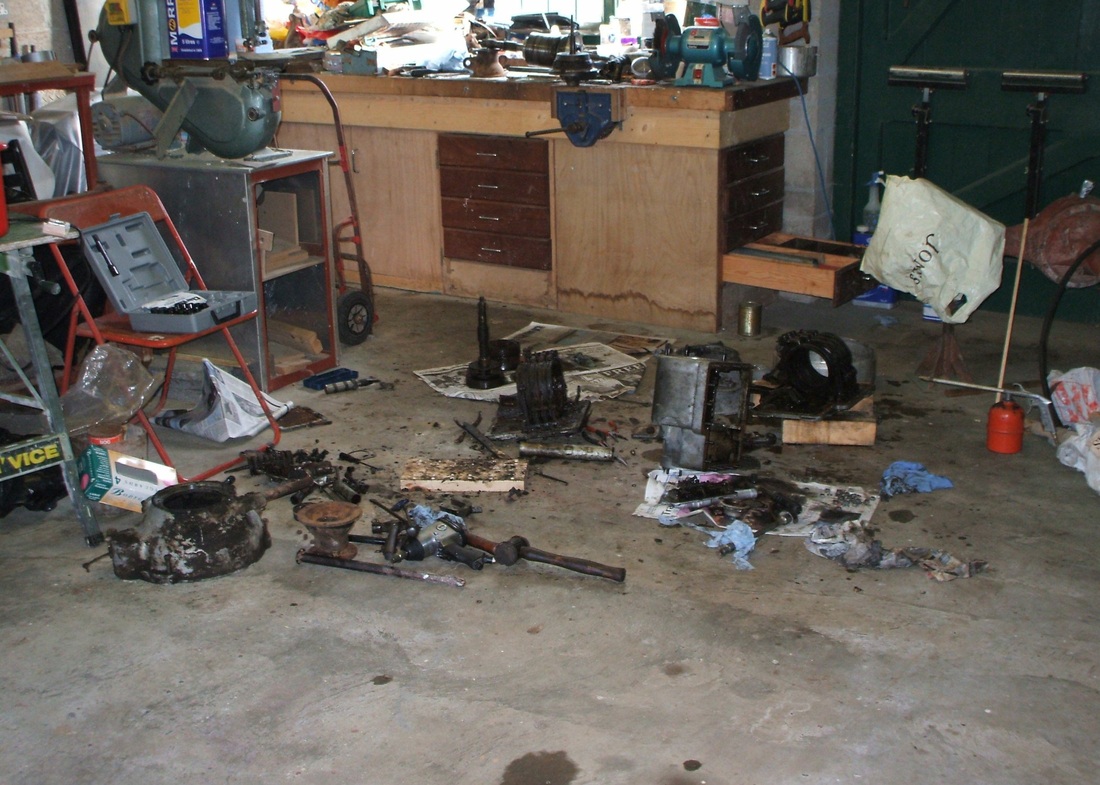
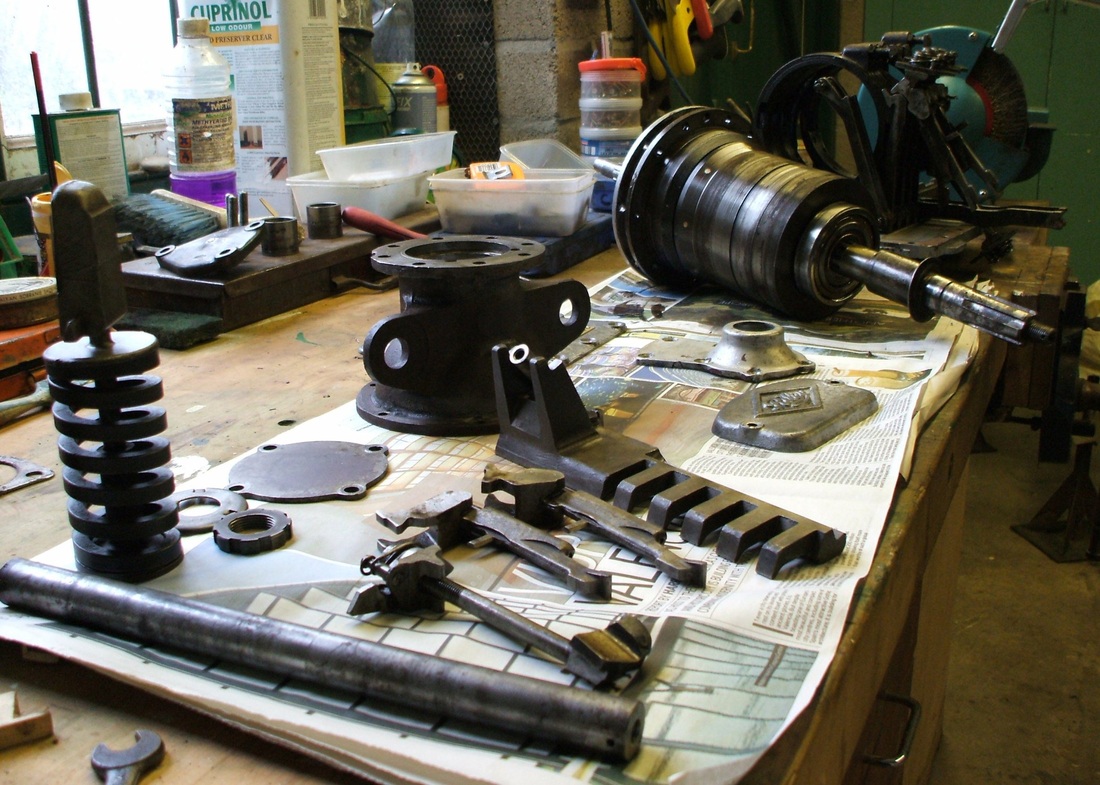
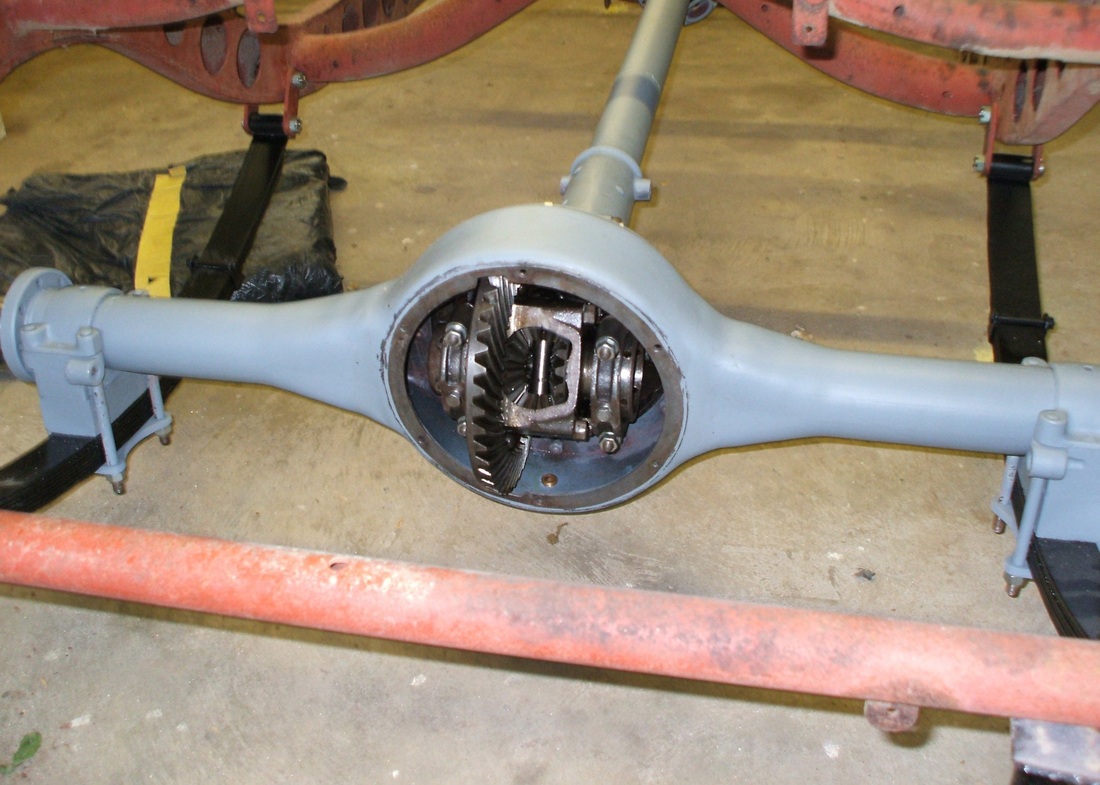
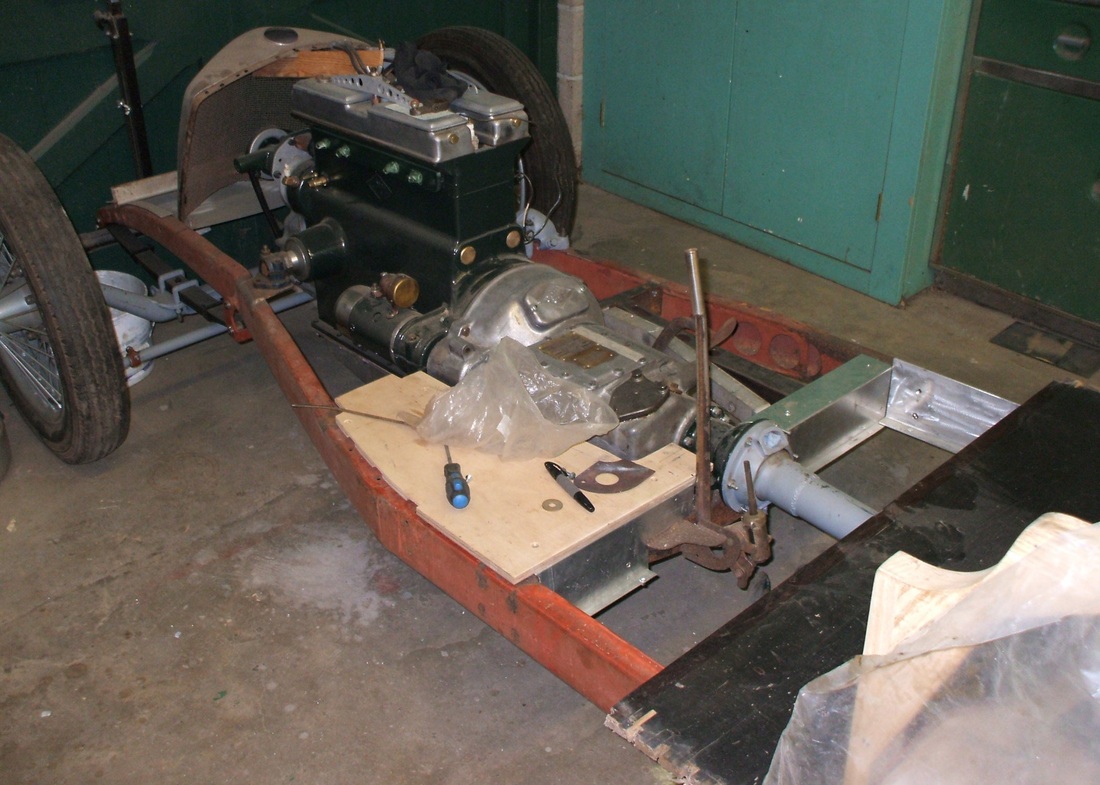
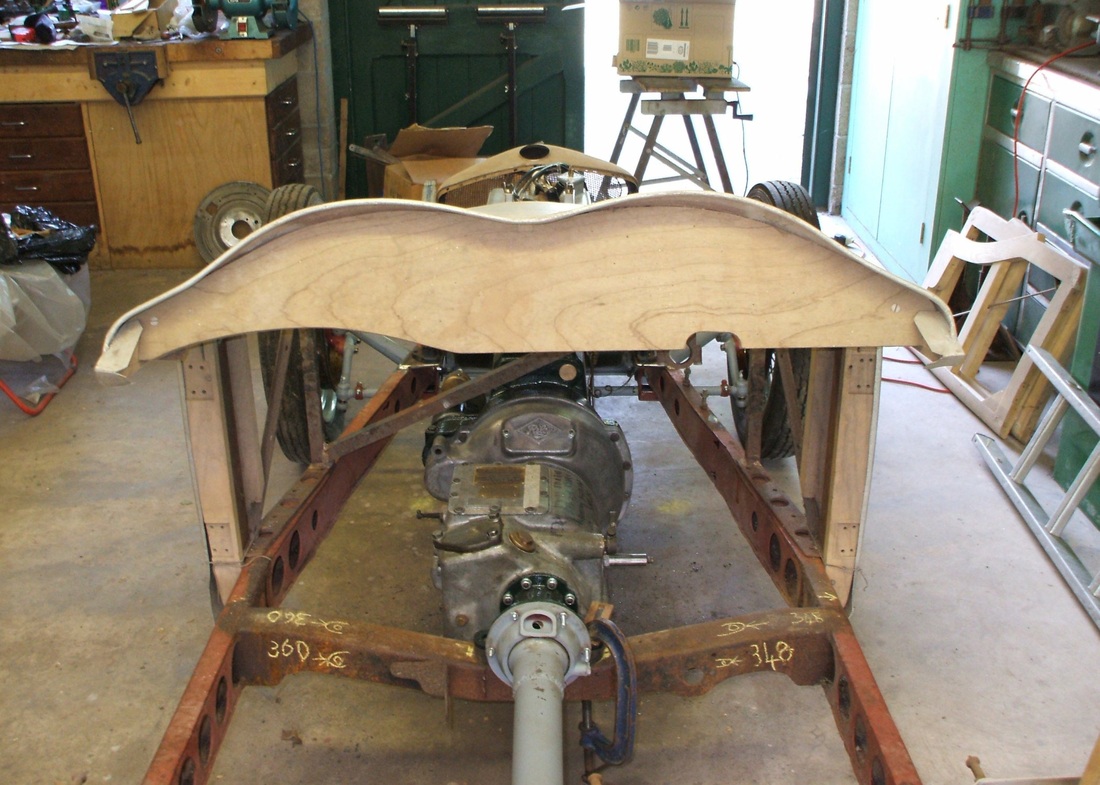
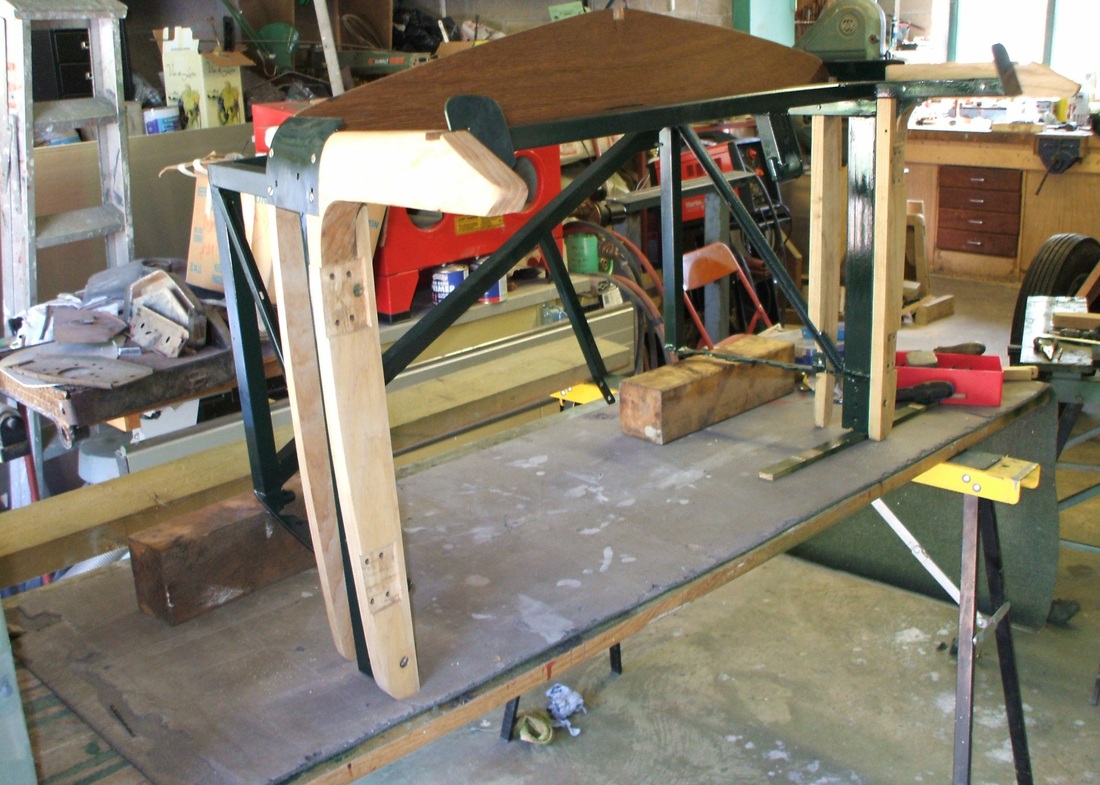
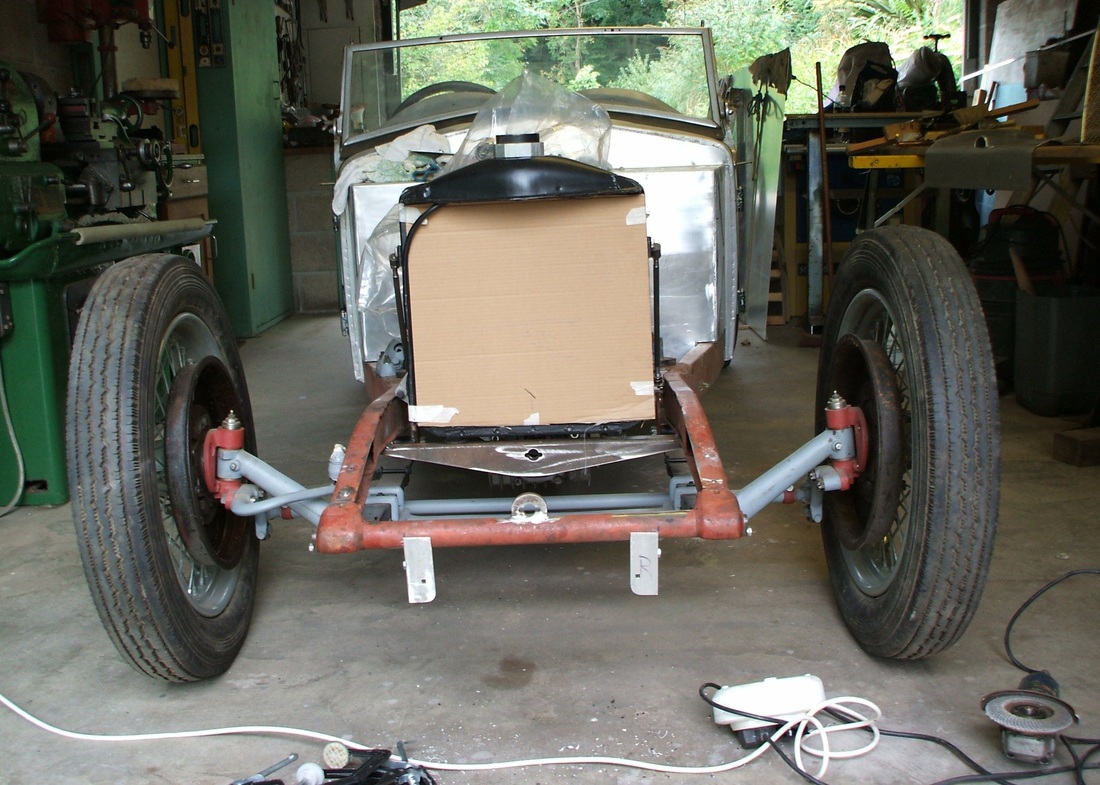
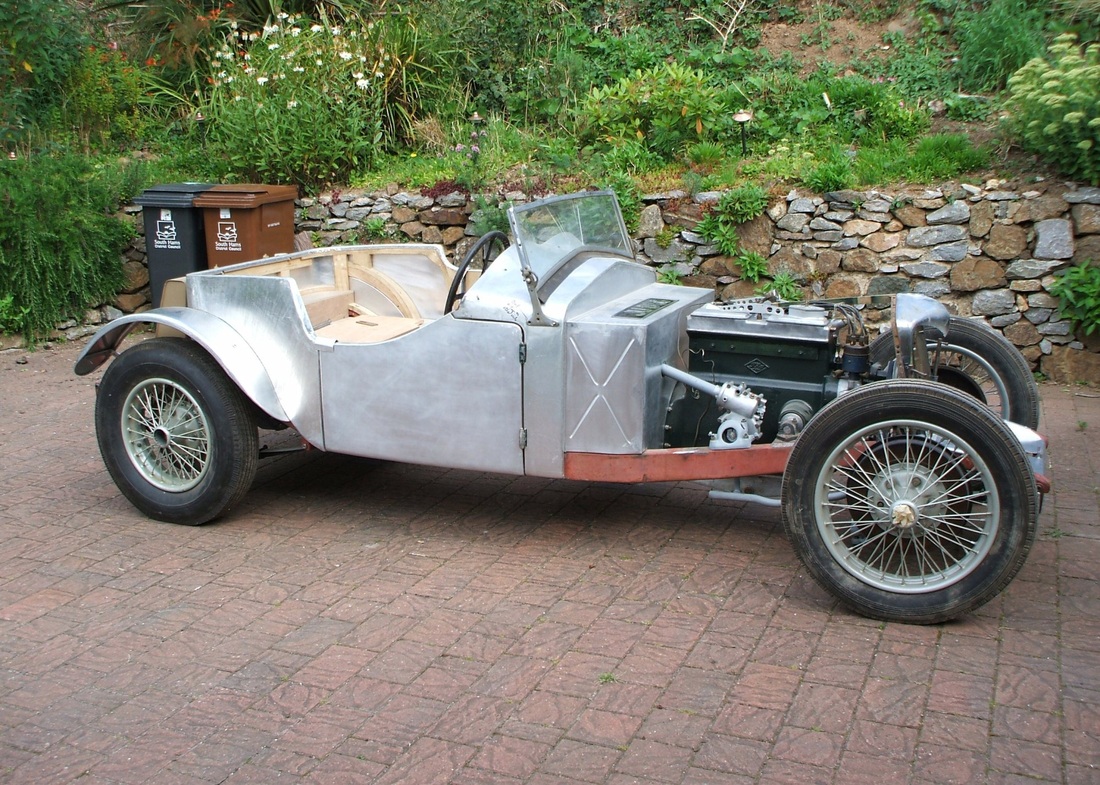
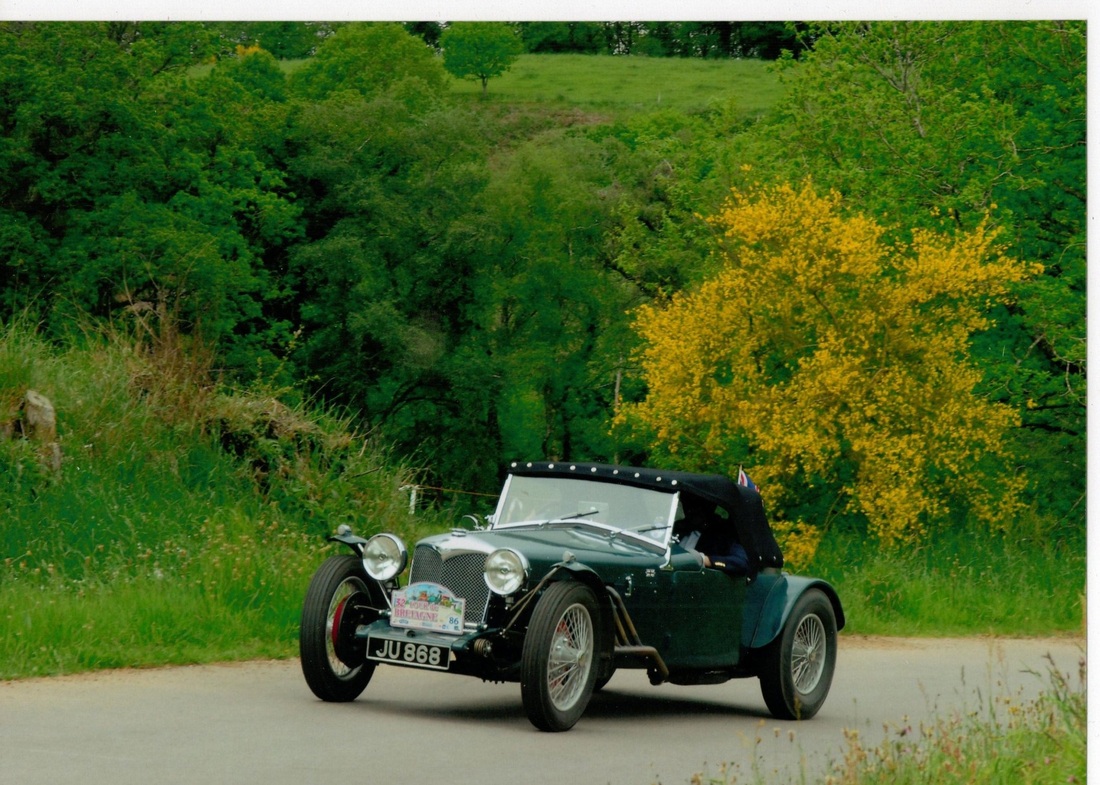
1932 Riley 14/6 Special Full Restoration
- Mike Doran
|
|
|
|
|
|
|
|
|

|
|
|
|
|
|
|
|

|
|

|
|
|
|

|
|

|
|
|
|
|
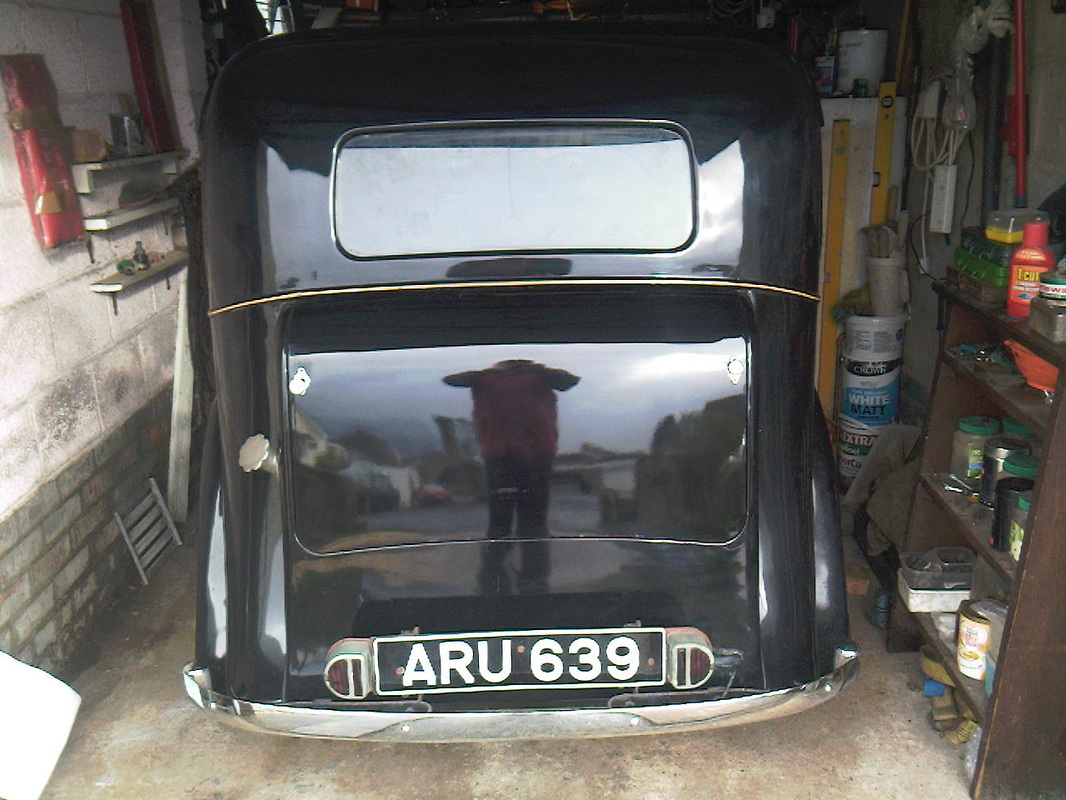
Nigel Caine - 1935 Standard 10

|
|
|
|

|
1999 TVR Chimaera Body Restoration
- John Winzer
November 2014:
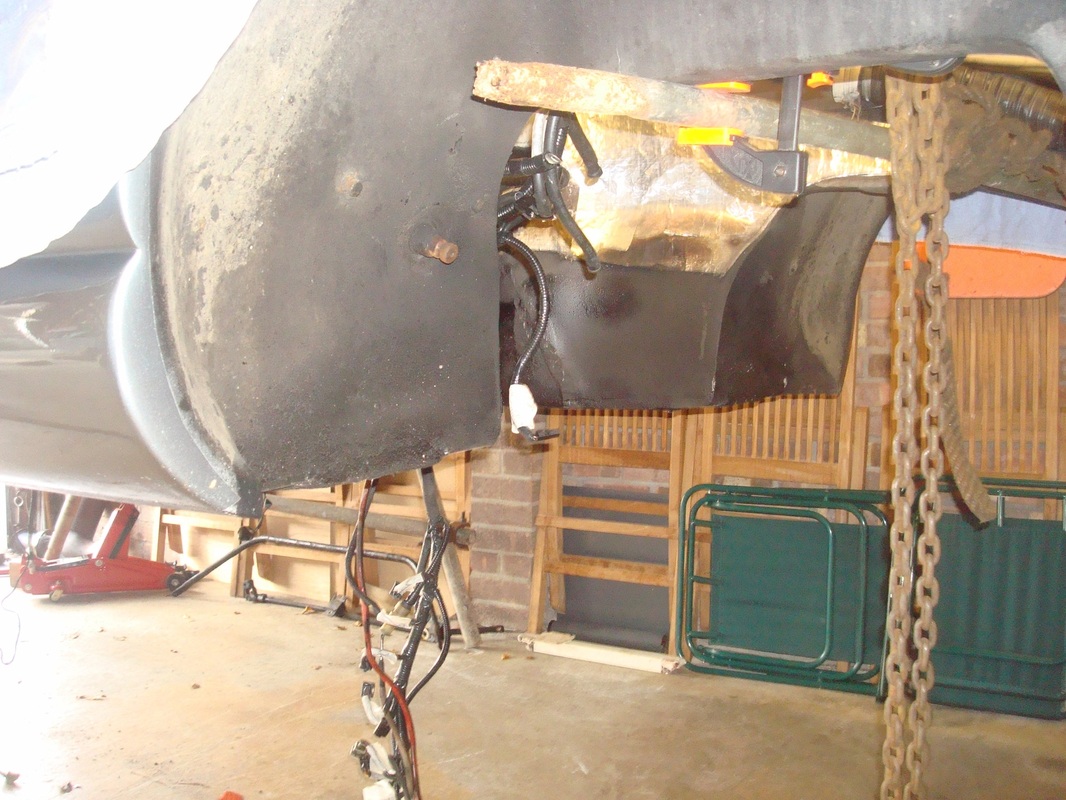
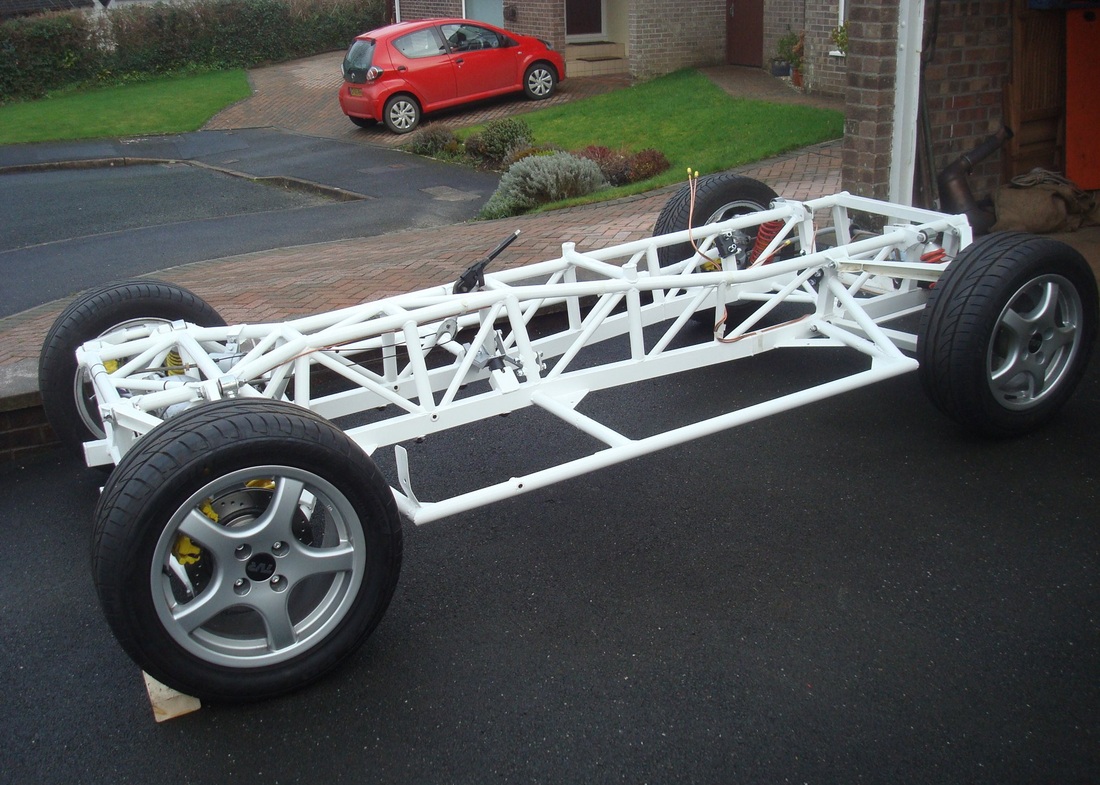
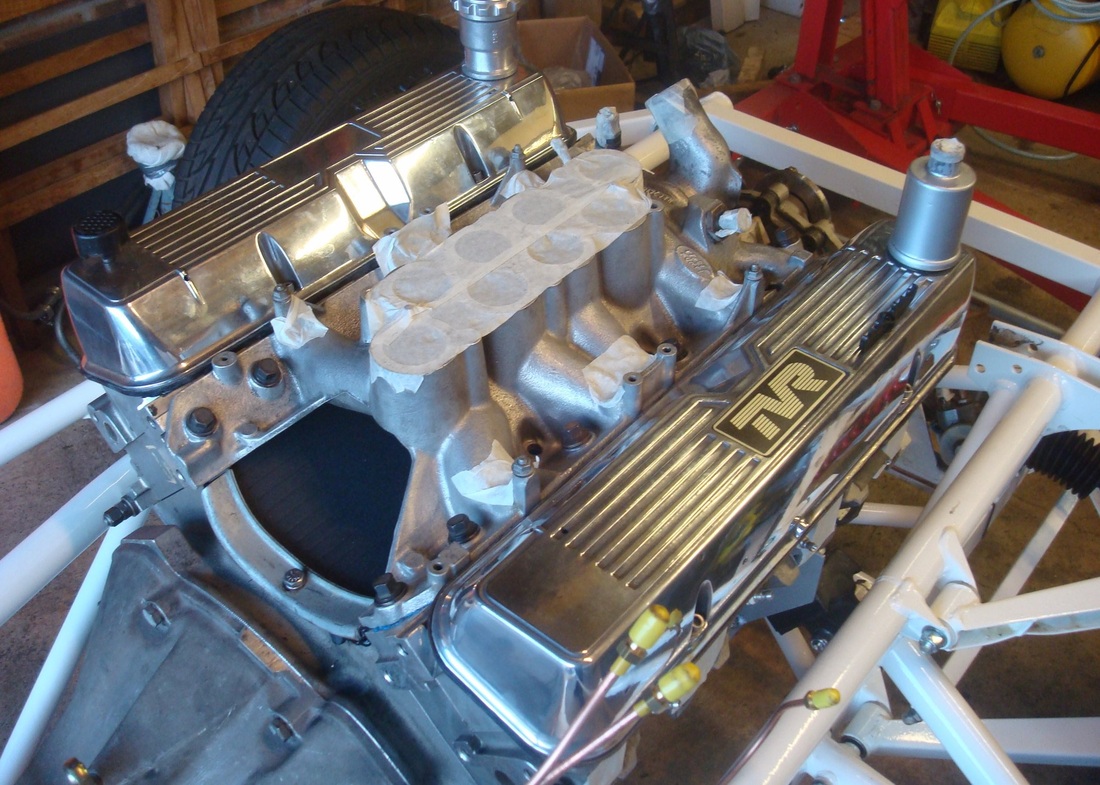
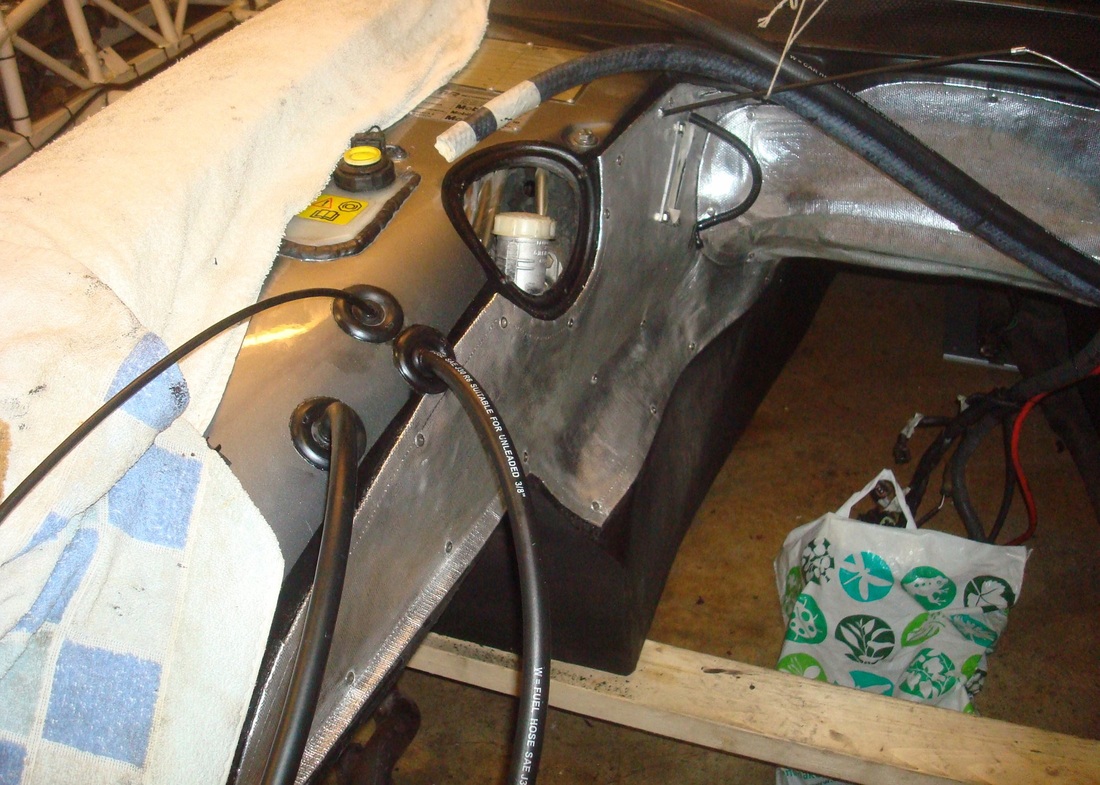
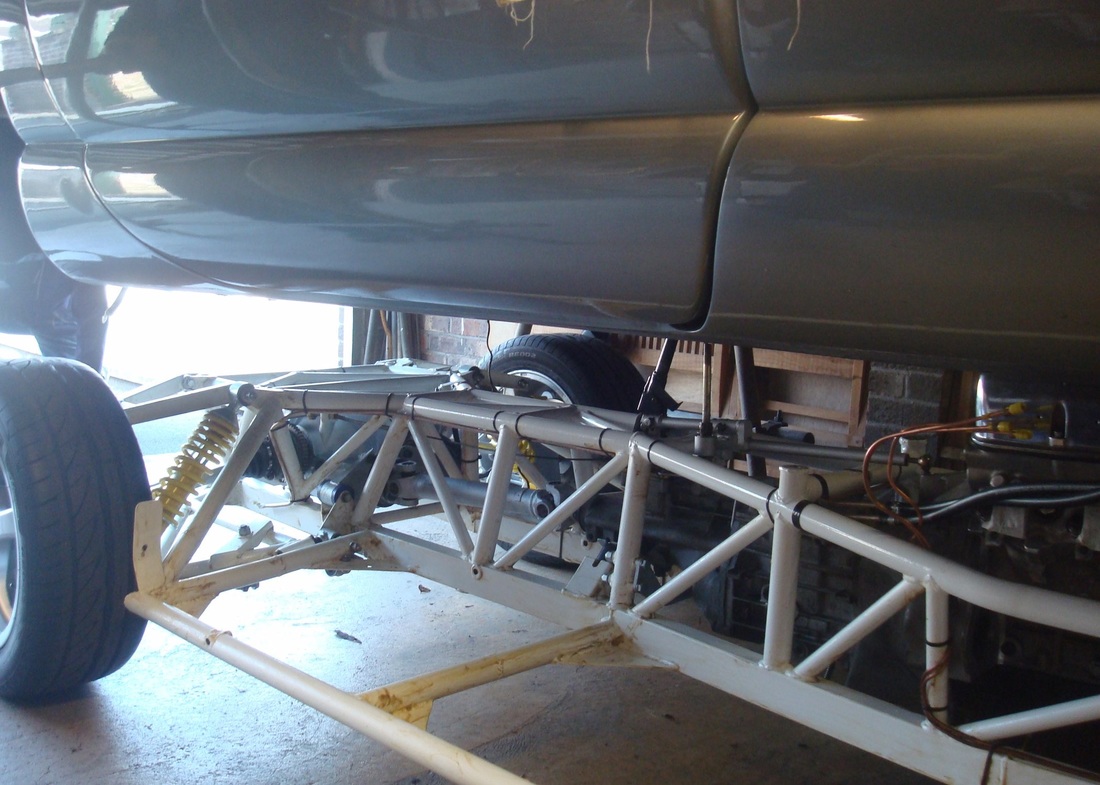
Undertaking a chassis refurbishment of the TVR as the original powder coating is flaking off. This is a class problem with the late 90’s TVR's due to the fact that the factory started to do the powder coating themselves, whereas prior to this the process was subcontracted out to a specialist. Next steps are to strip the chassis and get it shot blasted, hot zinc sprayed then powder coated.
April 2015.
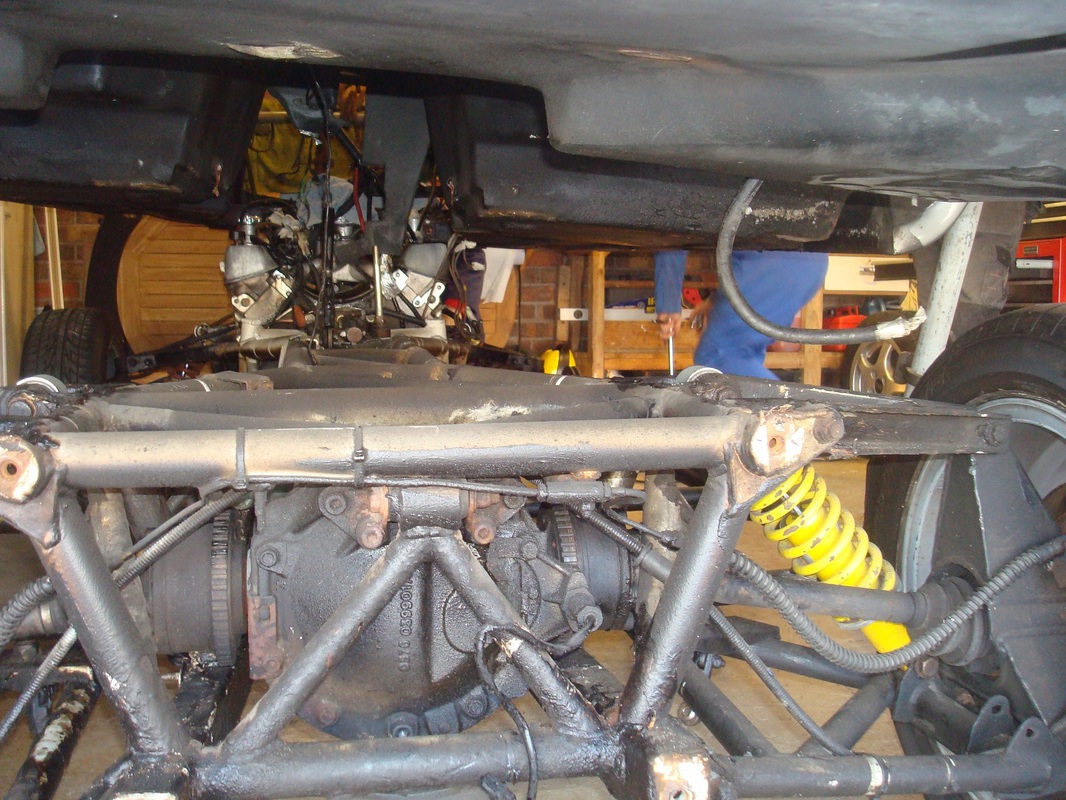
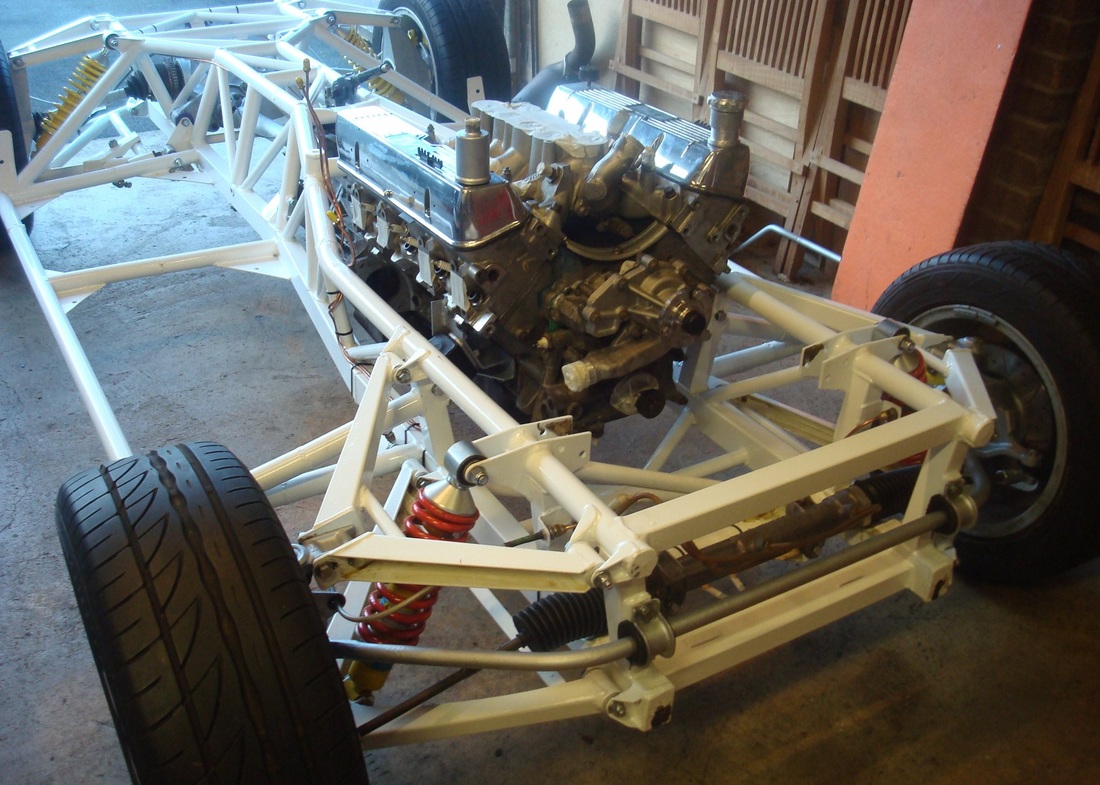
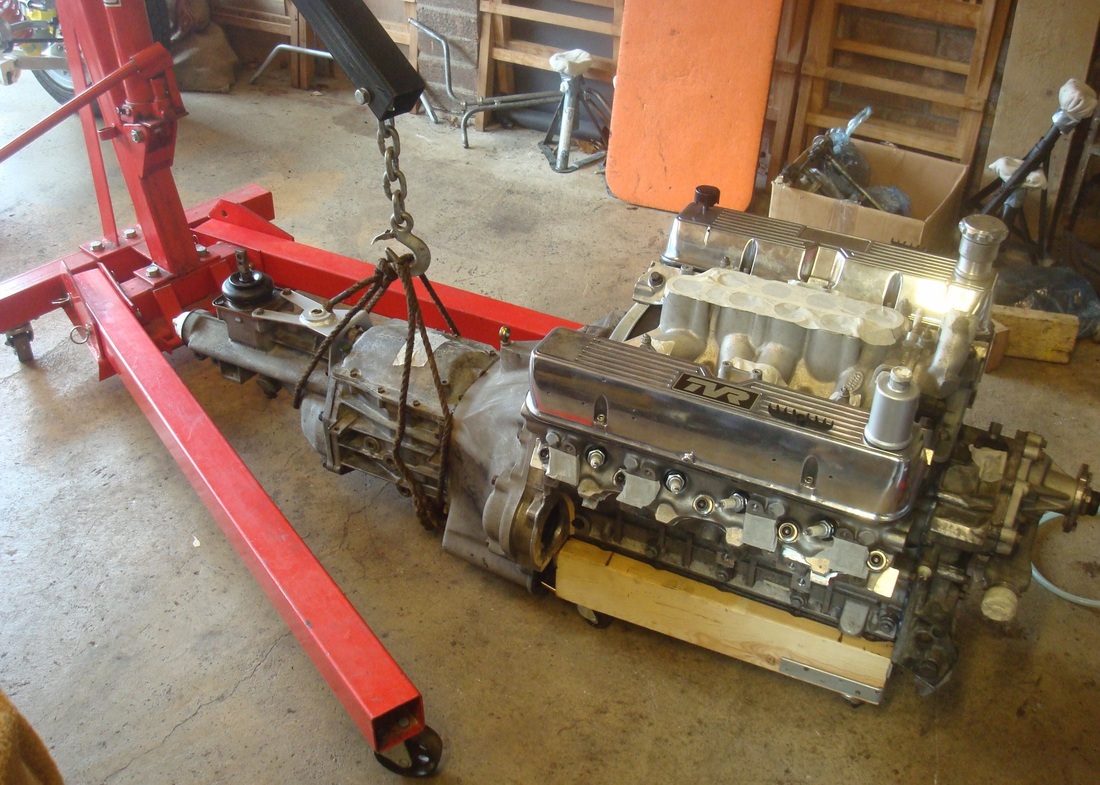
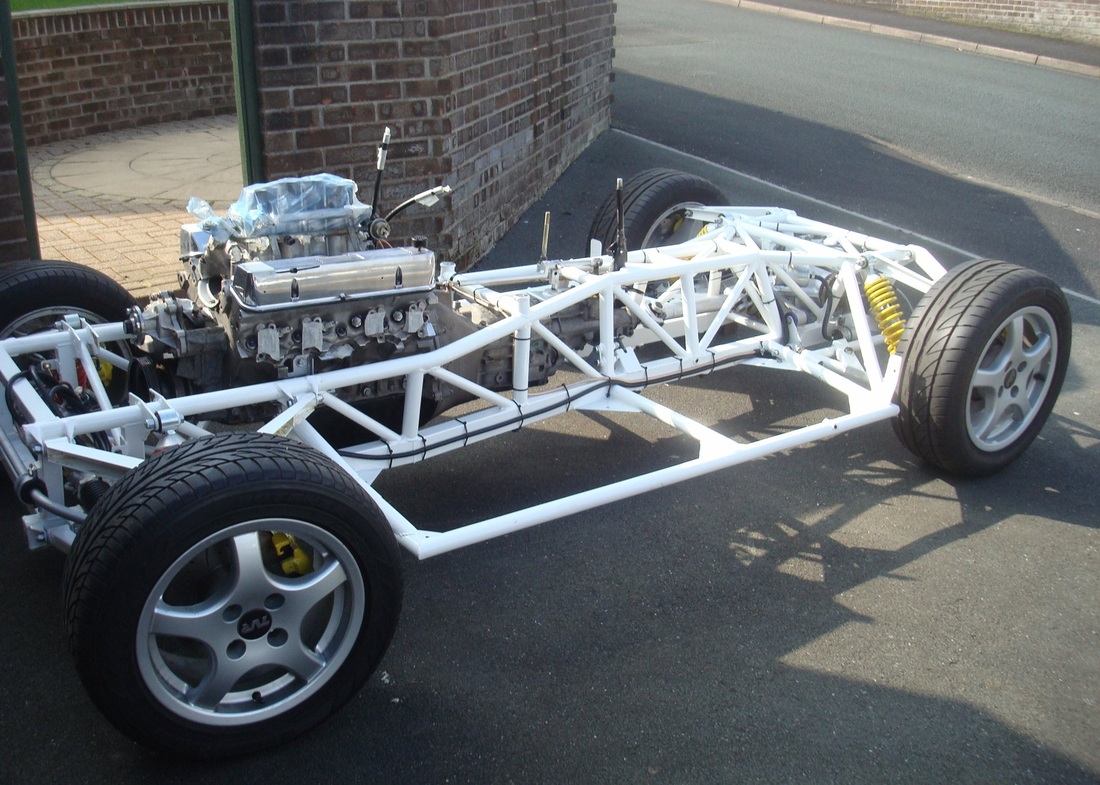
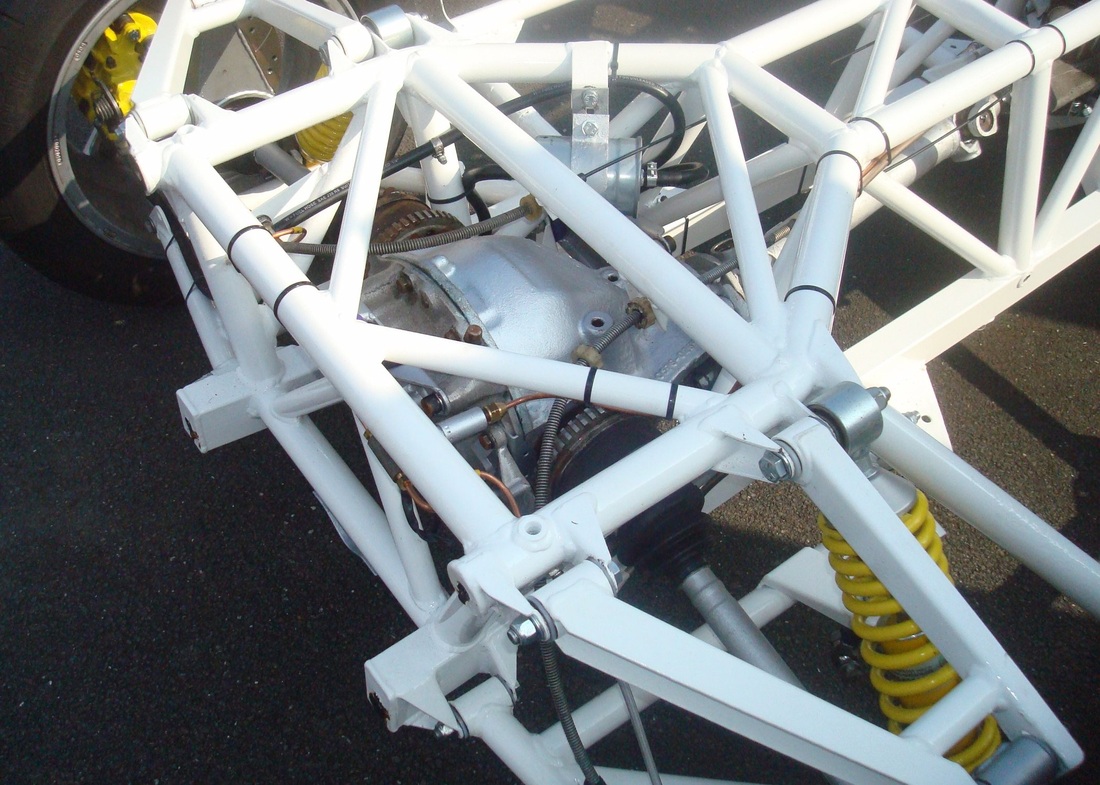
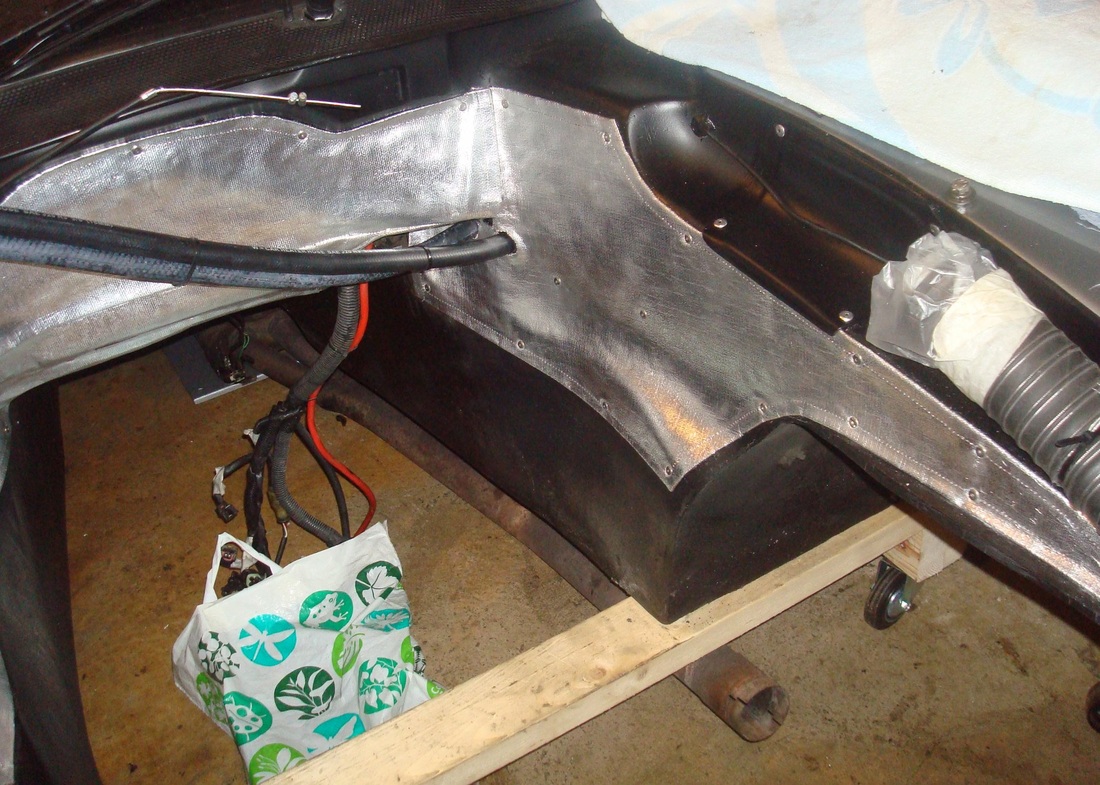
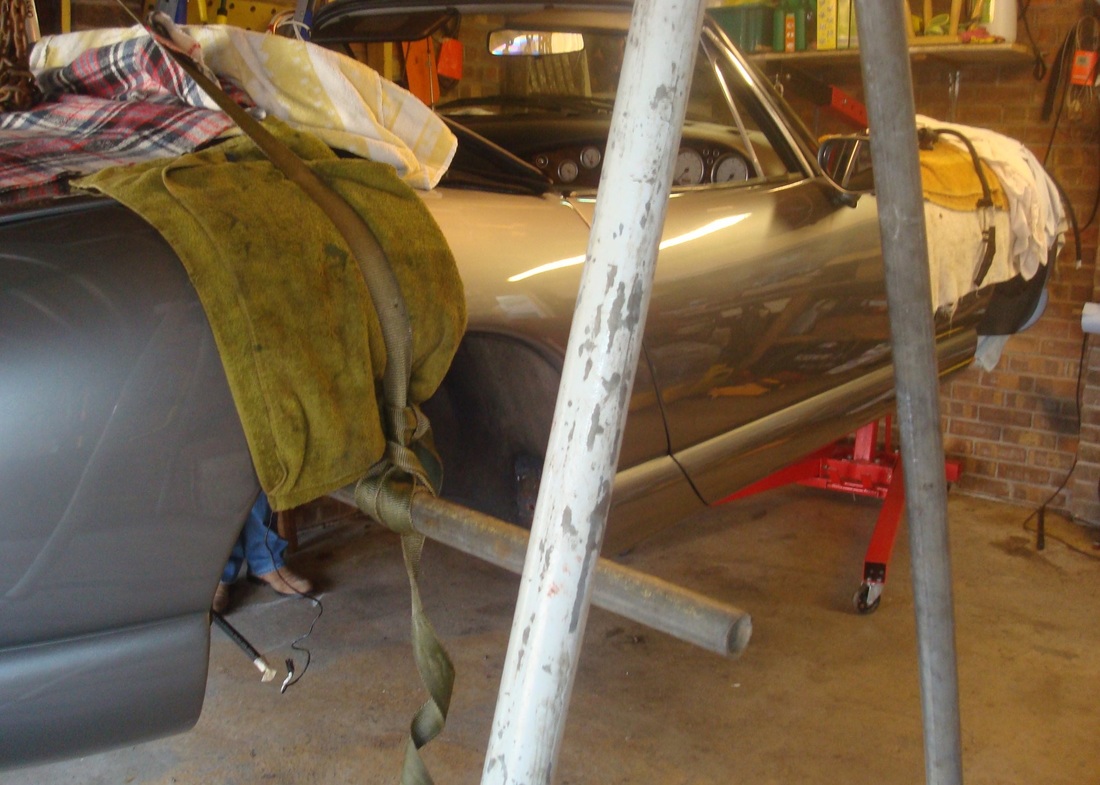
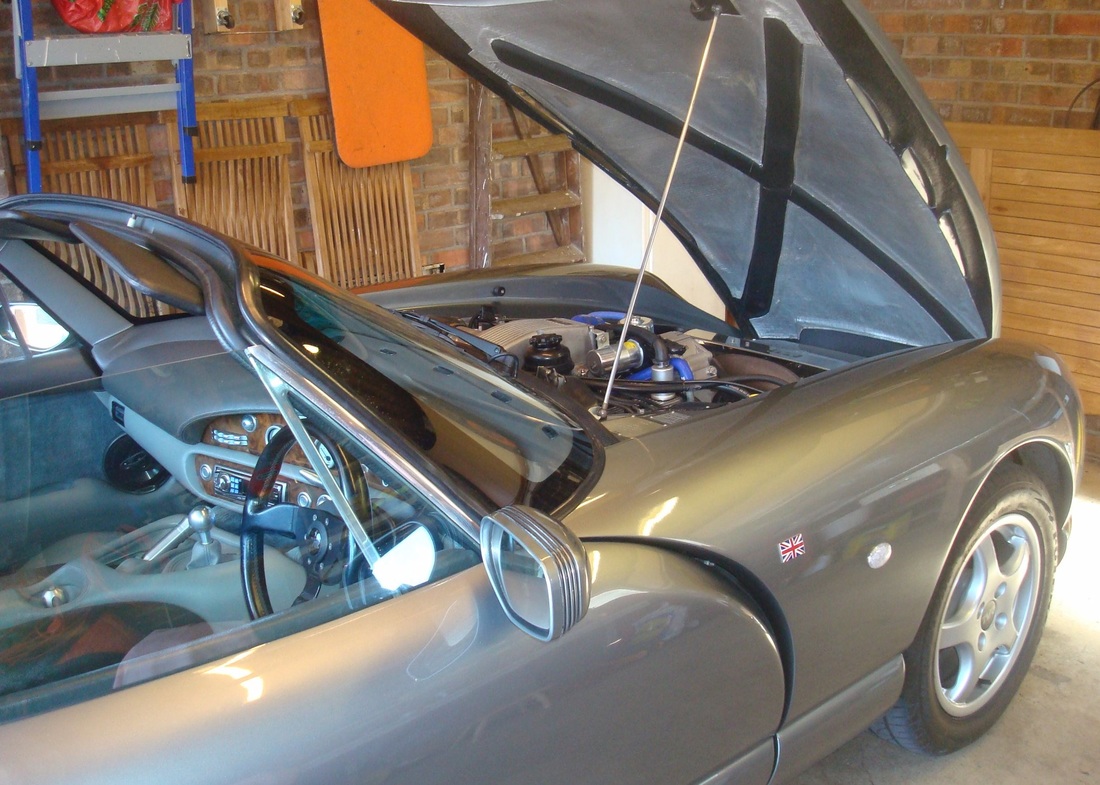
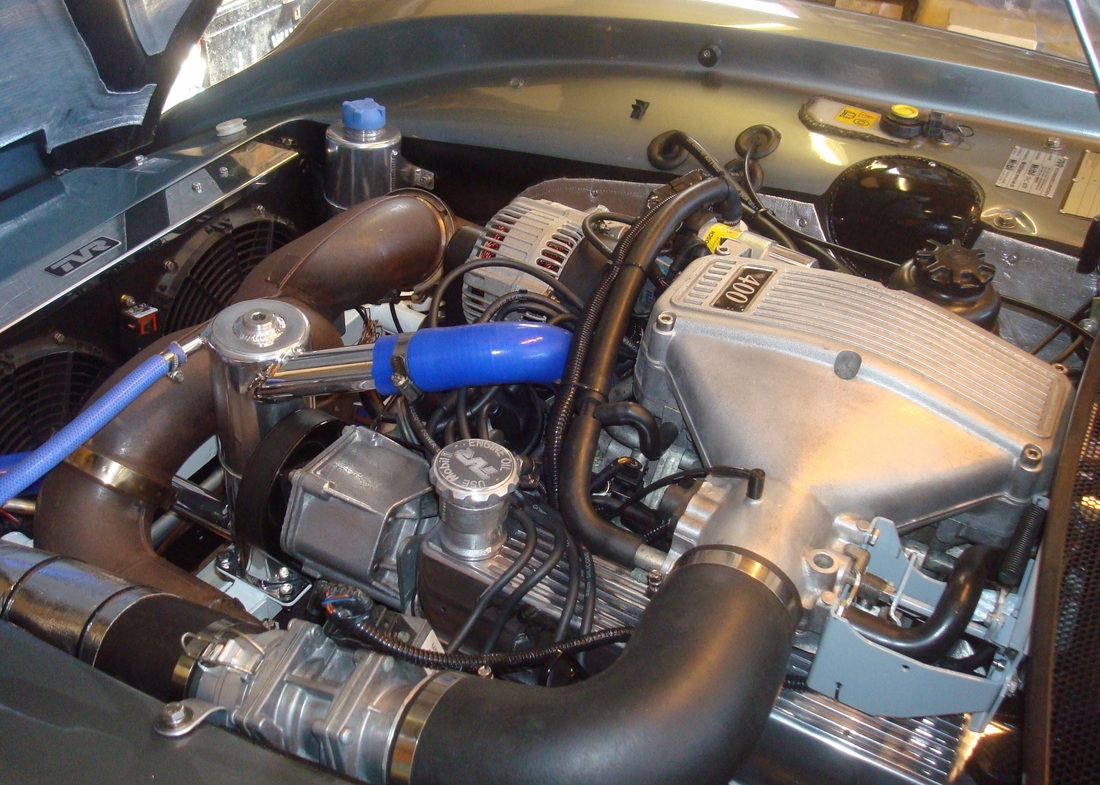
The chassis work is completed and after a partial recondition of the engine it was mated with the gearbox and installed in the chassis.The body engine bay was also smartened up with new heatshields and some fresh paint. The pictures show the body hoisted and the rolling chassis wheeled underneath. The body was lowered and bolted on with no issues. One week later after installing and connecting all the ancillaries, the battery was installed and the engine started and ran with good oil pressure and no real problems. The engine has now bedded in and the adjustable front and rear suspension has been set up by a specialist. The car is running well. Overall a very pleasing result. The time taken for the project was 535 hours over a period of 134 days.
Undertaking a chassis refurbishment of the TVR as the original powder coating is flaking off. This is a class problem with the late 90’s TVR's due to the fact that the factory started to do the powder coating themselves, whereas prior to this the process was subcontracted out to a specialist. Next steps are to strip the chassis and get it shot blasted, hot zinc sprayed then powder coated.
April 2015.
The chassis work is completed and after a partial recondition of the engine it was mated with the gearbox and installed in the chassis.The body engine bay was also smartened up with new heatshields and some fresh paint. The pictures show the body hoisted and the rolling chassis wheeled underneath. The body was lowered and bolted on with no issues. One week later after installing and connecting all the ancillaries, the battery was installed and the engine started and ran with good oil pressure and no real problems. The engine has now bedded in and the adjustable front and rear suspension has been set up by a specialist. The car is running well. Overall a very pleasing result. The time taken for the project was 535 hours over a period of 134 days.
|

|
|

|
|
|
January 2015
|
January 2015
February 2015
February 2015
|
January 2015
February 2015
February 2015
|
March 2015
|

March 2015
|
March 2015
|
March 2015
|
March 2015
|
April 2015
|
April 2015
|
April 2015
|
April 2015
|

April 2015
|
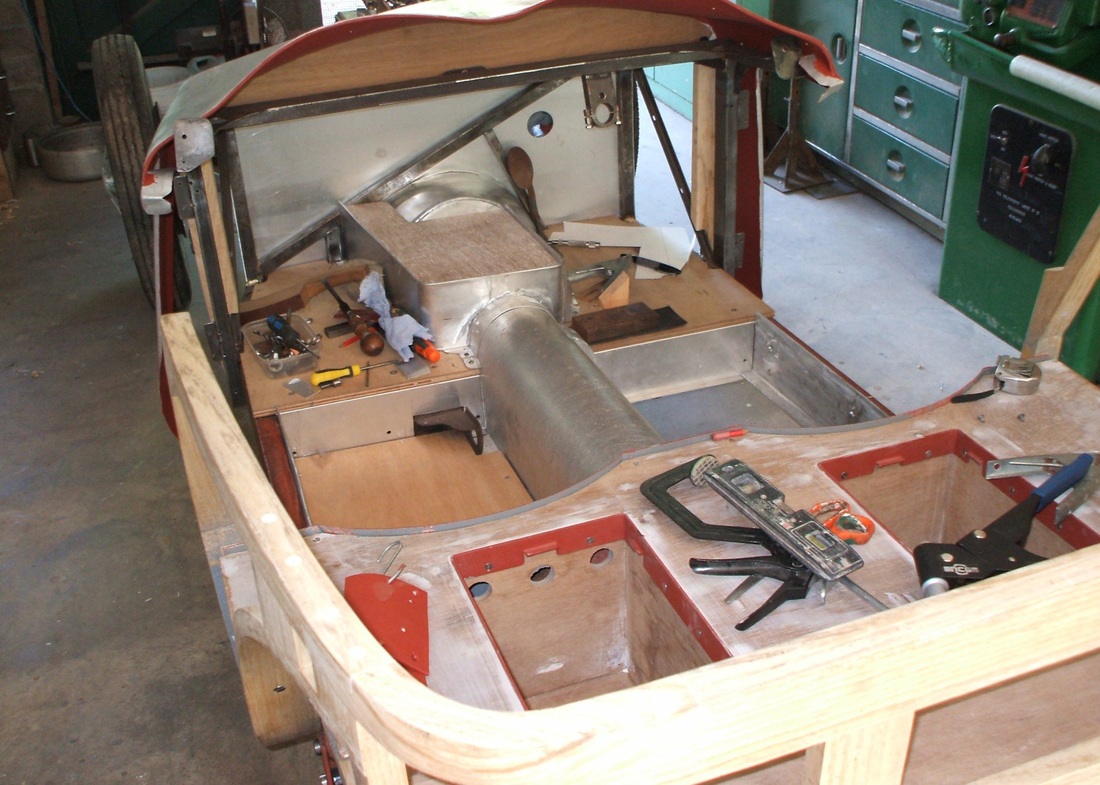
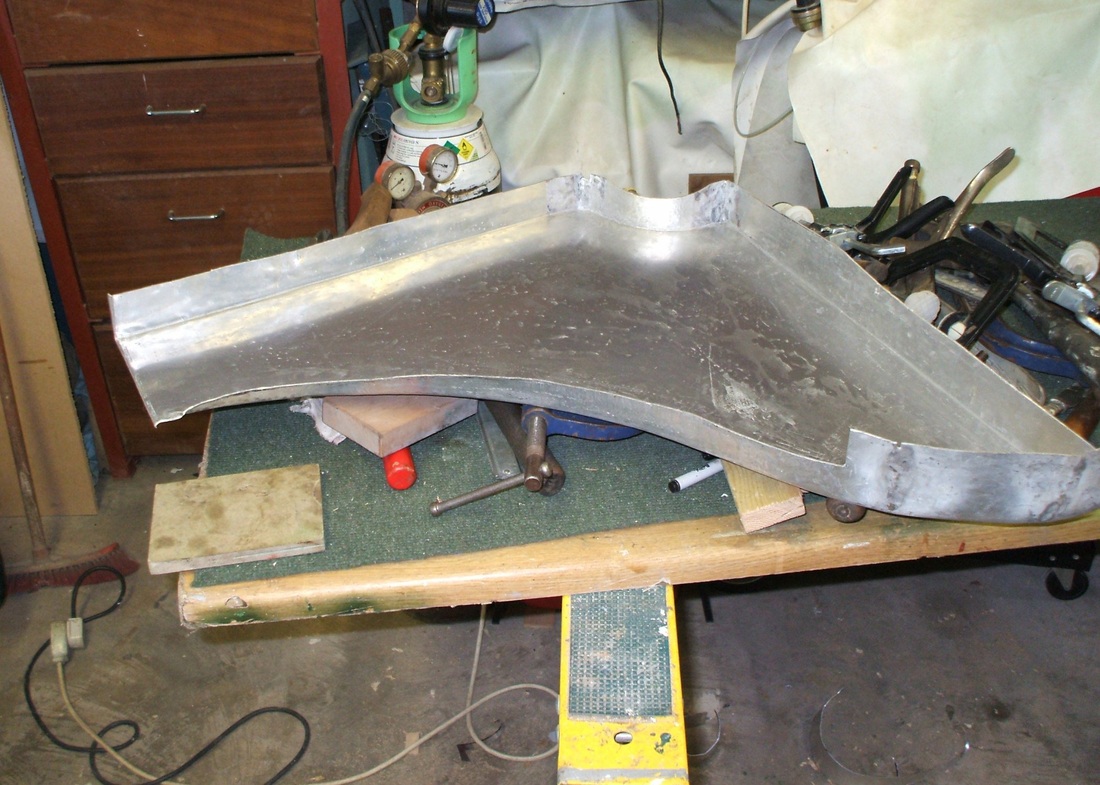
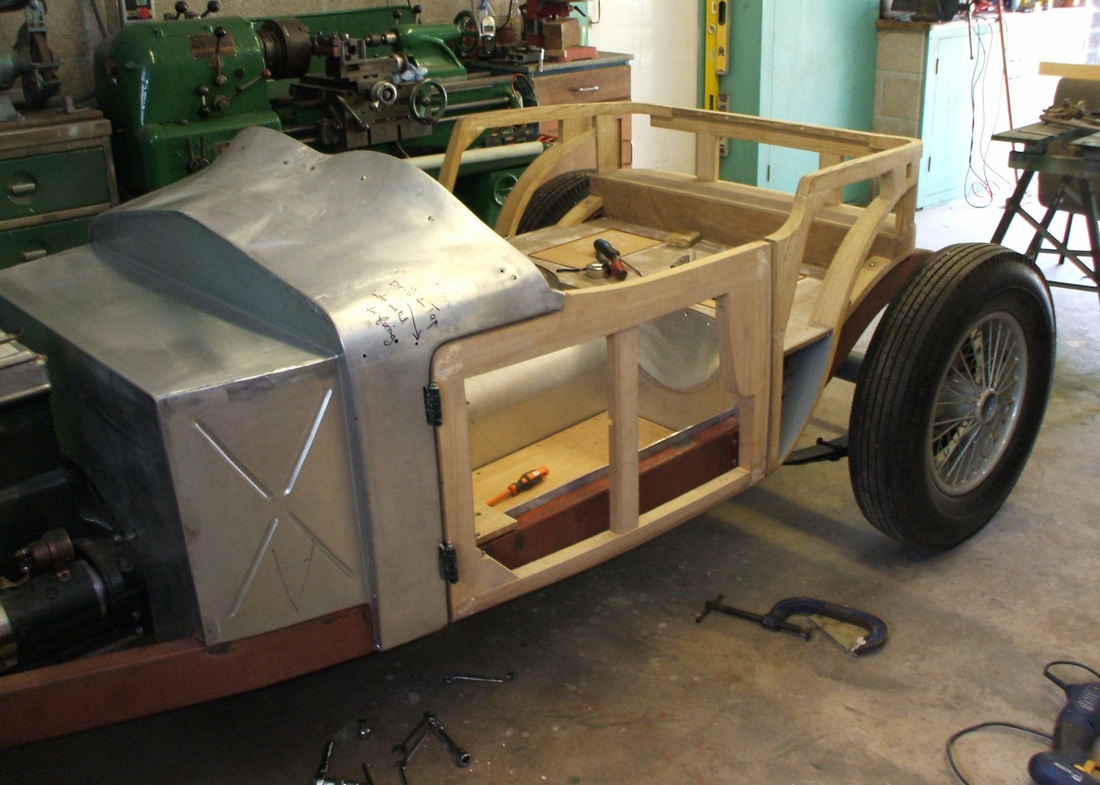
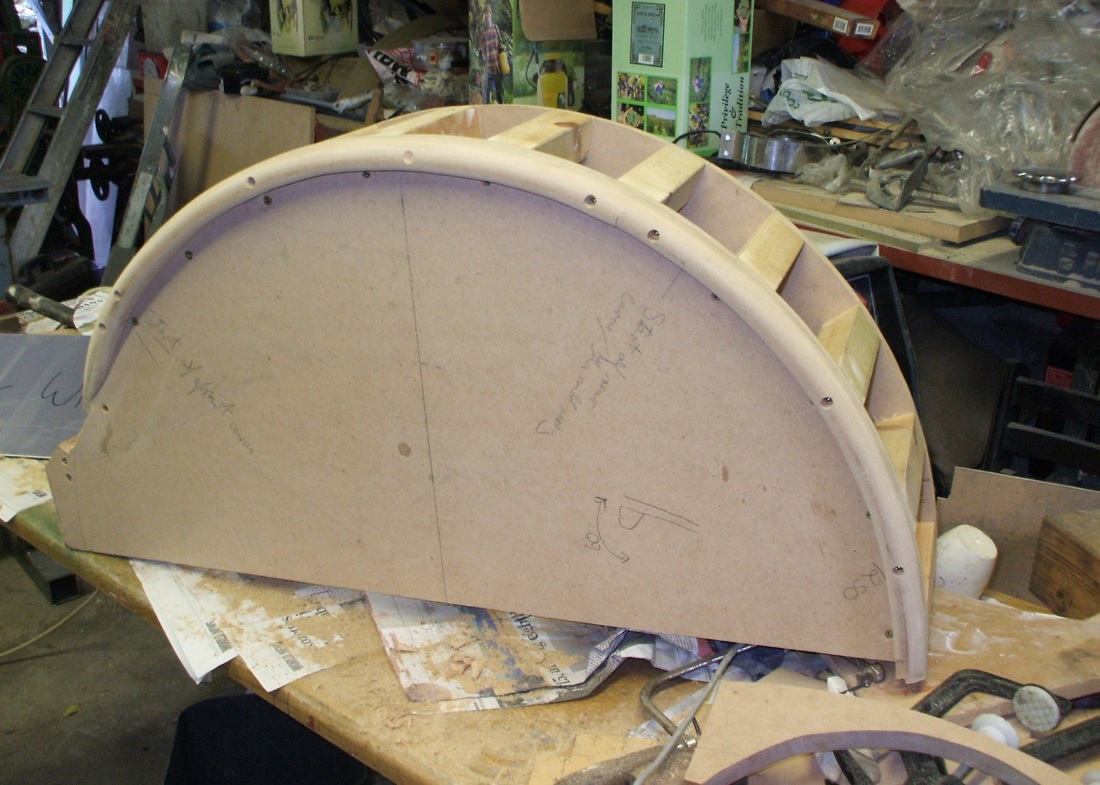
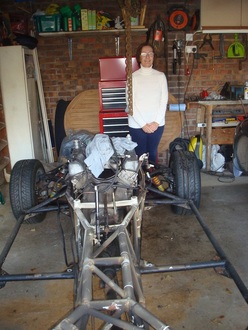
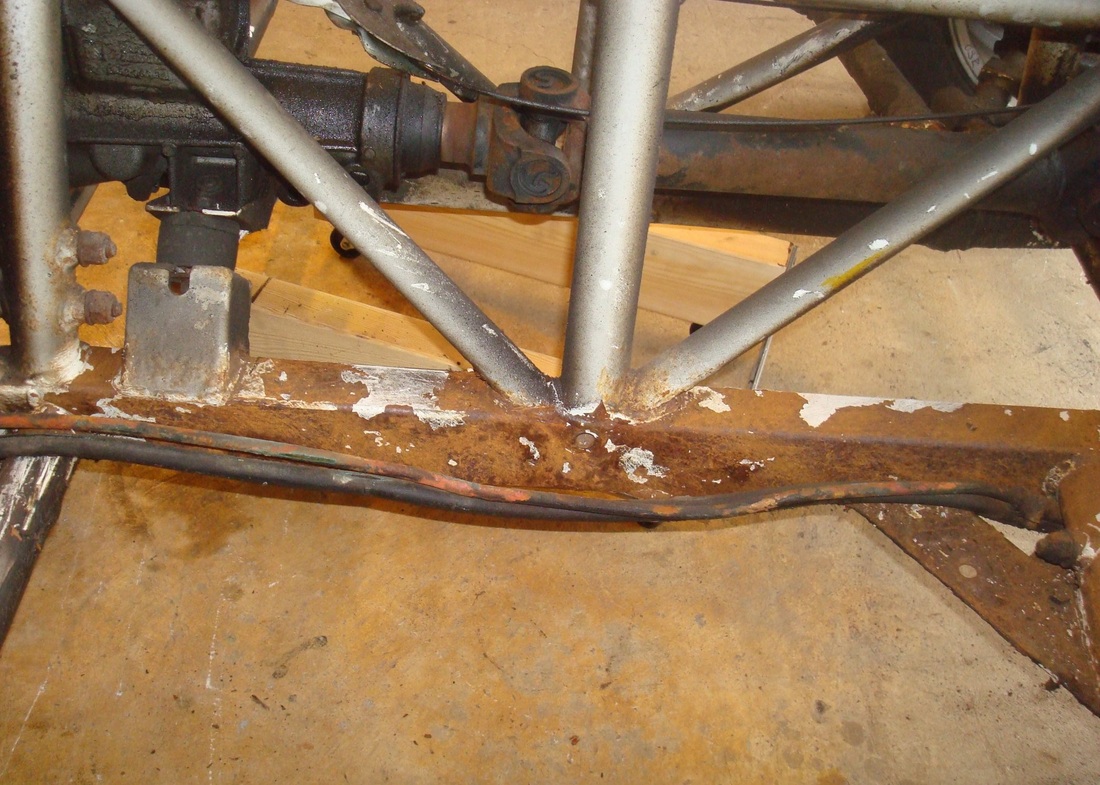
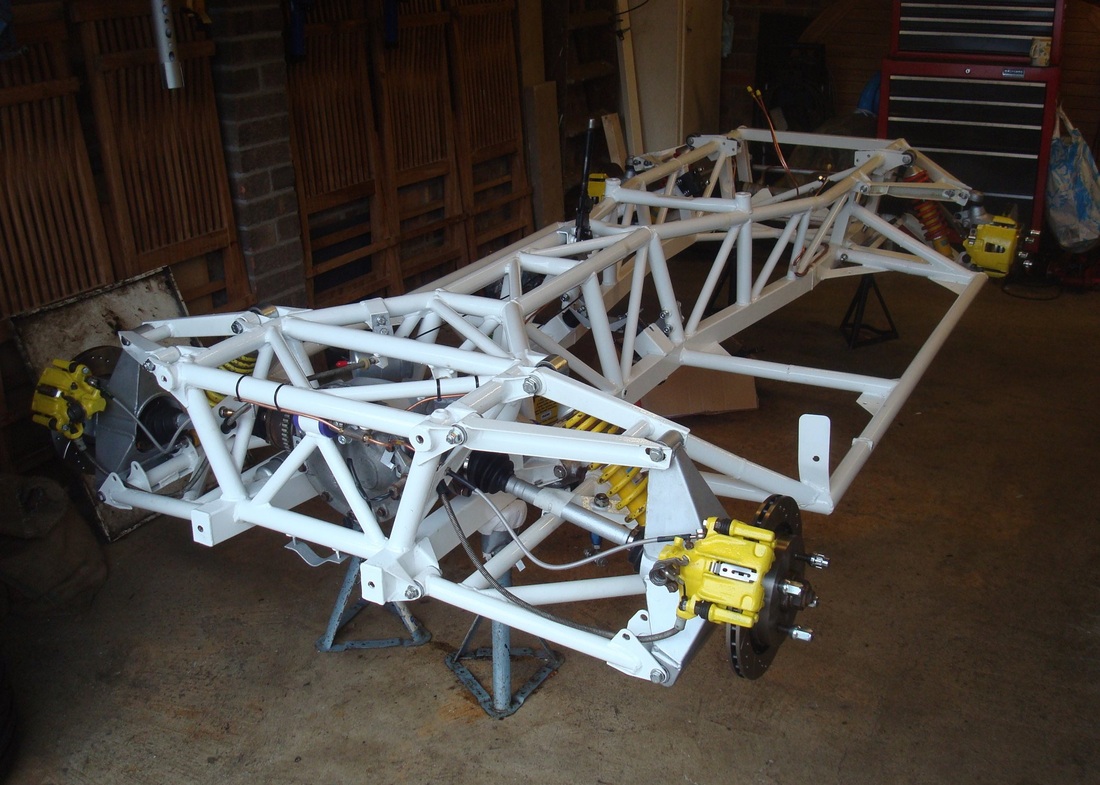
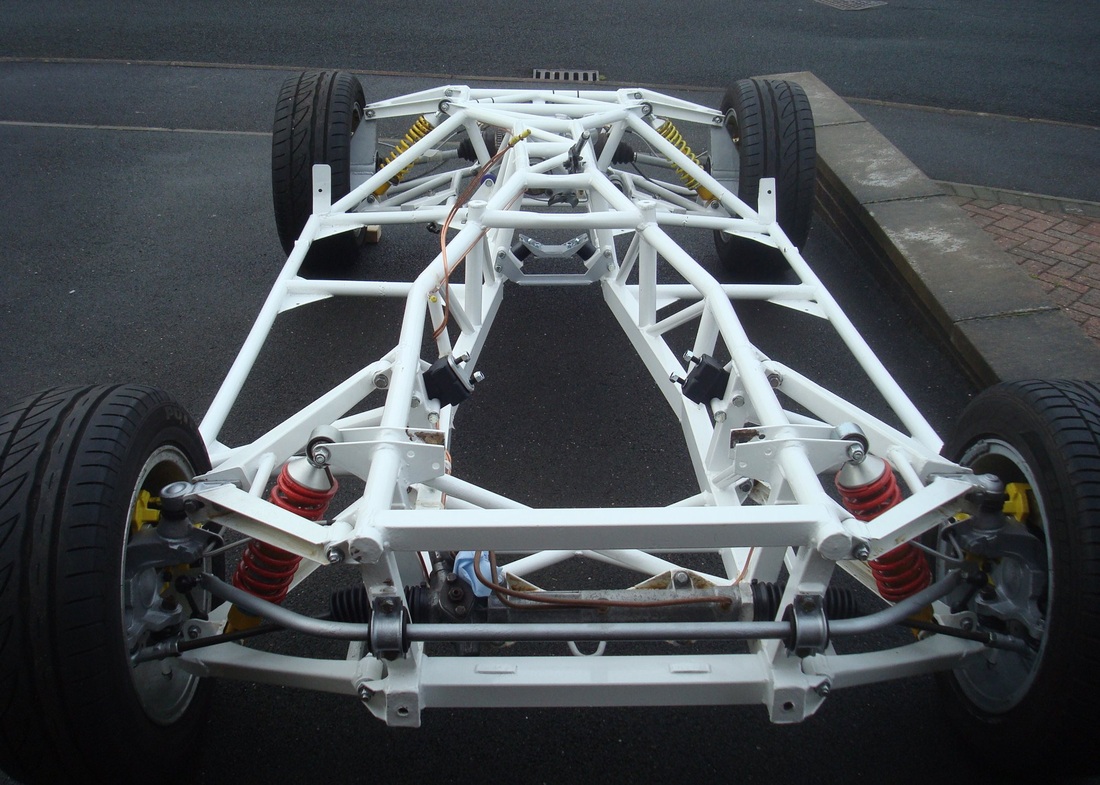
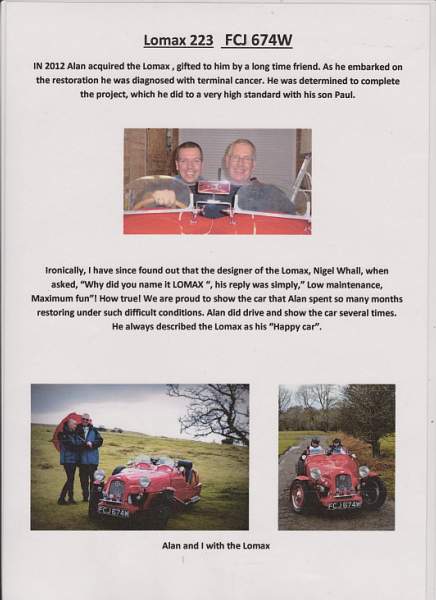
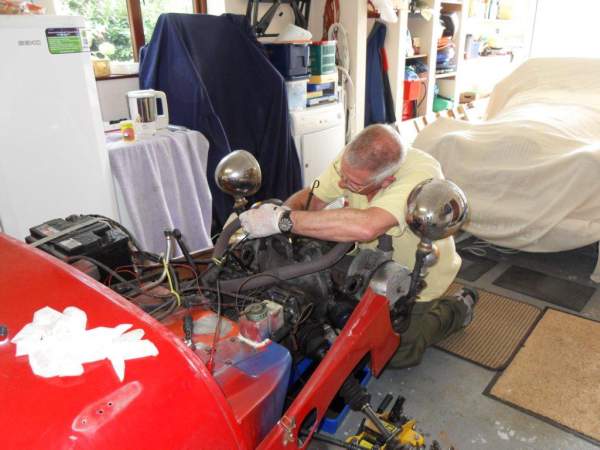
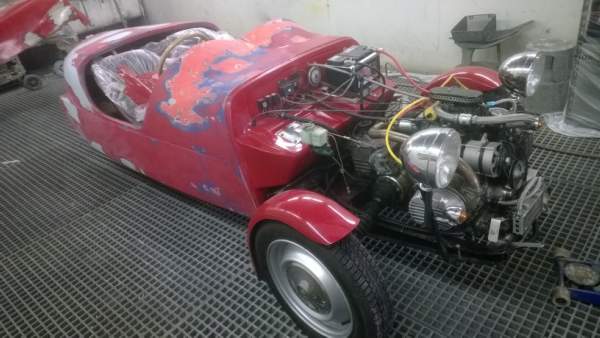
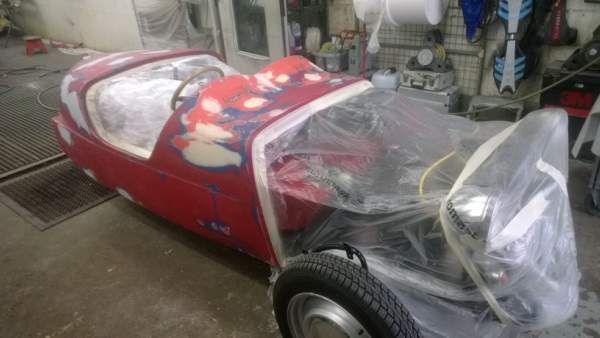
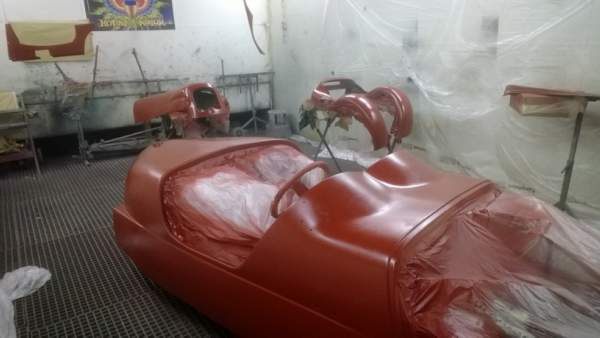
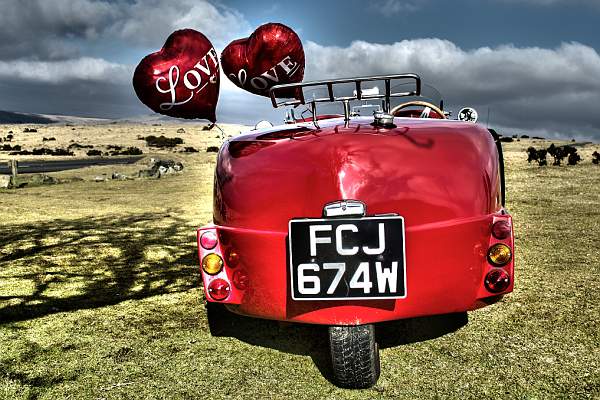
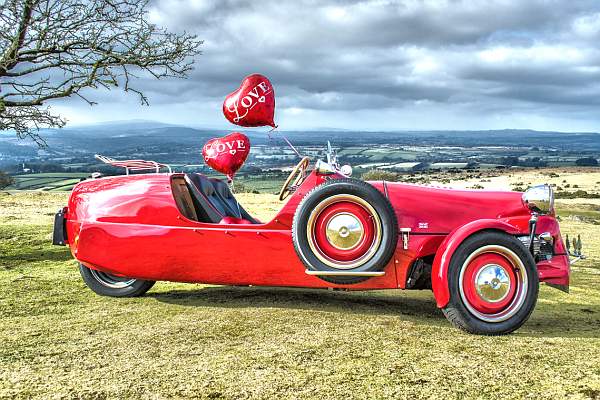
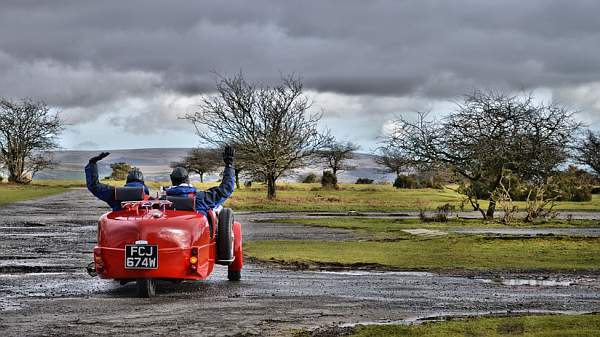
LOMAX 233 FCJ 674W - By Mrs Alan Stevens


|

|
|

|
|
|
|
|
|
|